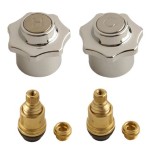
Replace Delta Bathroom Sink Faucet Cartridge
A dripping faucet is not only annoying, but it can also waste a lot of water. If your Delta bathroom sink faucet is dripping, it's likely that the cartridge needs to be replaced. Replacing a Delta faucet cartridge is a relatively easy task that can be completed in about 30 minutes.
Here's a step-by-step guide on how to replace a Delta bathroom sink faucet cartridge:
Tools You'll Need:
- Adjustable wrench
- Phillips head screwdriver
- Allen wrench (if necessary)
- New Delta faucet cartridge
Steps:
- Turn off the water supply to the faucet. There are usually two shut-off valves under the sink, one for the hot water and one for the cold water. Turn both valves clockwise to turn off the water.
- Remove the faucet handle. Most Delta faucet handles are held in place by a small screw on the underside of the handle. Use a Phillips head screwdriver to remove the screw and then pull the handle straight up to remove it.
- Unscrew the packing nut. The packing nut is located where the faucet handle was attached. Use an adjustable wrench to loosen the packing nut and then remove it by hand.
- Pull out the old cartridge. The cartridge is located inside the faucet body. Use your fingers or a pair of pliers to pull the cartridge straight out.
- Insert the new cartridge. Line up the new cartridge with the faucet body and push it into place. Make sure that the cartridge is fully seated.
- Tighten the packing nut. Hand-tighten the packing nut onto the faucet body. Then, use an adjustable wrench to tighten the packing nut an additional 1/4 to 1/2 turn.
- Reinstall the faucet handle. Push the faucet handle back onto the faucet body. Then, use a Phillips head screwdriver to tighten the screw that holds the handle in place.
- Turn on the water supply and check for leaks. Turn on both shut-off valves under the sink to turn on the water supply. Check for any leaks around the faucet. If there are any leaks, tighten the packing nut a little more.
Replacing a Delta bathroom sink faucet cartridge is a simple task that can be completed in about 30 minutes. By following these steps, you can easily fix a dripping faucet and save yourself the cost of calling a plumber.
Tips:
- If you have a Delta faucet with a pull-out spray head, you may need to remove the spray head before you can remove the cartridge.
- Some Delta faucets have an Allen screw that holds the cartridge in place. If your faucet has an Allen screw, you will need to use an Allen wrench to remove the screw before you can remove the cartridge.
- When you are tightening the packing nut, be careful not to overtighten it. Overtightening the packing nut can damage the faucet.

Delta Ceramic Stem Cartridge For 2 Handle Faucets In White Rp47422 The Home

Delta Rless Faucet Cartridge Installation

How To Replace The Cartridge In A Single Handle Delta Faucet Repair

Delta Stem Cartridge Repair Kit Rp42096 The Home

How To Replace Leaky Cartridges In A Bathroom Faucet Repair

Danco Metal Faucet Repair Kit Delta Delex In The Kits Components Department At Com

Delta Bathroom Sink Kitchen Cartridges 1 5 D Chrome Rp50587 The Home

Delta Faucet Cartridge Repair

Quickly Replace A Leaky Faucet Cartridge Diy Family Handyman

Delta Faucet Cartridge Repair
See Also


