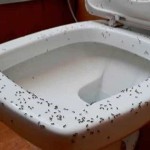
Mold Spots On Ceiling In Bathroom: Identification, Causes, and Remediation
Mold spots on the bathroom ceiling are a common household problem, often signaling underlying issues with ventilation and moisture control. These spots, usually dark in color and sometimes fuzzy in texture, are not merely aesthetic blemishes; they indicate the presence of a mold colony that could potentially impact indoor air quality and structural integrity over time. Understanding the causes, identifying the type of mold, and implementing effective remediation strategies are crucial steps in maintaining a healthy and safe bathroom environment.
This article will provide a comprehensive overview of mold spots on bathroom ceilings, focusing on the factors that contribute to their formation, methods for identification, and established protocols for safe and effective removal. It will delve into preventative measures that can mitigate the recurrence of mold, thereby safeguarding the health and structural well-being of the home.
Identifying Mold on the Bathroom Ceiling
Accurately identifying mold on the bathroom ceiling is the first essential step in addressing the problem. Mold manifests itself in various ways, and while some species are relatively harmless, others can pose significant health risks. Visual inspection is usually the initial method of detection, followed by, if necessary, professional testing.
The characteristics of mold spots can vary based on the type of mold and the surface it colonizes. Common visual indicators of mold include:
*Color:
Mold can appear in a variety of colors, including black, green, brown, white, and even pink or orange. Black mold, often identified as *Stachybotrys chartarum*, is a particularly concerning species, though not all black molds are toxic. *Texture:
The texture of mold can range from fuzzy or slimy to powdery or leathery. The texture often depends on the moisture level and the age of the colony. *Pattern:
Mold growth often starts as small, isolated spots that gradually expand and merge to form larger patches. These patches can have irregular edges. *Location:
Mold frequently appears in areas with high humidity and poor ventilation, such as corners, around exhaust fans, and near showers or tubs.It's important to note that discoloration of the ceiling surface doesn't automatically indicate mold. Stains from water leaks or accumulated dust can sometimes mimic the appearance of mold. To differentiate between mold and other stains, carefully observe the texture and pattern of the discoloration. Mold typically has a three-dimensional appearance, while stains are usually flat.
If visual identification is inconclusive, professional mold testing can be conducted. Mold testing involves collecting samples from the affected area and sending them to a laboratory for analysis. The laboratory will identify the specific types of mold present and provide information about their potential health risks. While DIY mold testing kits are available, professional testing offers more accurate and reliable results.
Understanding the Causes of Mold Growth
Mold thrives in environments with moisture, humidity, and a food source (organic materials). The bathroom, with its frequent exposure to water and steam, provides an ideal breeding ground for mold. Several factors contribute to the development of mold spots on the bathroom ceiling.
*High Humidity:
The high humidity levels in bathrooms, especially during and after showers or baths, are a primary cause of mold growth. When warm, moist air comes into contact with cooler surfaces, such as the ceiling, condensation forms. This condensation provides the moisture needed for mold spores to germinate and grow. Inadequate ventilation exacerbates this issue, trapping moisture and creating a perpetually damp environment. *Poor Ventilation:
Proper ventilation is crucial for removing excess moisture from the bathroom. Exhaust fans are designed to extract humid air and circulate fresh air. However, if the exhaust fan is not functioning correctly, is too small for the size of the bathroom, or is not used consistently, moisture will accumulate, increasing the risk of mold growth. Additionally, blocking natural ventilation by keeping windows closed can contribute to the problem. *Water Leaks:
Undetected water leaks, whether from leaky plumbing, a dripping showerhead, or a roof leak above the bathroom, provide a constant source of moisture that fuels mold growth. Even small, slow leaks can create a consistently damp environment that encourages mold to flourish. It's essential to promptly repair any water leaks to prevent mold from developing. *Organic Materials:
Mold feeds on organic materials, such as cellulose found in drywall, wood, and even dust that settles on the ceiling. These materials provide the necessary nutrients for mold to grow and spread. The presence of organic materials, combined with moisture, creates a perfect environment for mold colonization. *Temperature:
Mold thrives in moderate temperatures, typically between 60°F and 80°F (15°C and 27°C). The warm temperatures commonly found in bathrooms further contribute to the conducive environment for mold growth.Addressing these underlying causes is essential for preventing mold from recurring after remediation. Simply removing the mold without addressing the source of moisture will only provide a temporary solution.
Remediation and Prevention Strategies
Once mold has been identified on the bathroom ceiling, prompt and effective remediation is necessary to prevent further growth and potential health problems. The remediation process typically involves cleaning or removing the mold-infested materials. Prevention strategies are then implemented to minimize the risk of future mold growth.
The remediation method depends on the extent of the mold growth. For small areas (less than 10 square feet), homeowners may be able to handle the cleanup themselves. However, larger areas or significant mold infestations should be addressed by a professional mold remediation company. Professional remediation companies have the expertise and equipment to safely and effectively remove mold and address the underlying moisture issues.
For DIY mold remediation, the following steps are generally recommended:
1.Safety Precautions:
Before starting the cleanup process, it's crucial to take necessary safety precautions. Wear protective gear, including gloves, a face mask (N-95 or higher), and eye protection, to prevent inhaling mold spores or coming into contact with contaminated materials. Ensure adequate ventilation by opening windows and using a fan to circulate air. 2.Containment:
Seal off the affected area to prevent mold spores from spreading to other parts of the house. Cover doorways and air vents with plastic sheeting secured with tape. 3.Cleaning:
Use a mold-killing solution, such as a mixture of bleach and water (1 part bleach to 10 parts water) or a commercial mold cleaner, to scrub the affected area. Apply the solution to the mold spots and scrub thoroughly with a brush or sponge. Allow the solution to sit for a few minutes before wiping it off with a clean cloth. 4.Drying:
Thoroughly dry the cleaned area with a towel or fan. Moisture promotes mold growth, so it's essential to ensure the area is completely dry. 5.Disposal:
Dispose of any contaminated materials, such as sponges, cloths, and brushes, in sealed plastic bags to prevent the spread of mold spores.For porous materials like drywall, if the mold infestation is severe, it may be necessary to remove and replace the affected sections. This should be done in a controlled manner to prevent the spread of mold spores. After removing the affected drywall, clean and disinfect the surrounding area before installing new drywall.
Prevention is key to avoiding future mold problems. The following strategies can help prevent mold growth in the bathroom:
*Improve Ventilation:
Ensure adequate ventilation by using the exhaust fan during and after showers or baths. If the existing fan is not powerful enough, consider upgrading to a larger or more efficient model. Keep windows open when possible to promote airflow. *Control Humidity:
Reduce humidity levels in the bathroom by taking shorter, cooler showers. Wipe down surfaces, such as shower walls and the ceiling, after each use to remove excess moisture. A dehumidifier can also be used to help control humidity levels. *Repair Leaks:
Promptly repair any water leaks, no matter how small. Check faucets, showerheads, and plumbing regularly for leaks, and address them immediately. *Clean Regularly:
Clean the bathroom regularly to remove dust, dirt, and other organic materials that can serve as a food source for mold. Pay particular attention to areas prone to moisture accumulation, such as corners and around fixtures. *Use Mold-Resistant Paint:
Consider using mold-resistant paint on the bathroom ceiling and walls. These paints contain additives that inhibit mold growth. *Maintain Proper Grout and Caulk:
Regularly check and maintain the grout and caulk around the tub, shower, and sink. Cracks and gaps in the grout or caulk can allow water to seep behind the tiles, creating a breeding ground for mold. Repair or replace damaged grout and caulk as needed.By understanding the causes of mold growth, implementing effective remediation strategies, and taking preventative measures, homeowners can maintain a healthy and mold-free bathroom environment.

Detecting And Preventing Mold Growth On Your Bathroom Ceiling Trusscore

Mold On Bathroom Ceiling How To Remove From Ceilings

Mold On Bathroom Ceiling How To Remove From Ceilings

Black Spots On The Bathroom Ceiling Flood Water Damage Honolulu Oahu Hawaii Md Restoration

How To Permanently Remove Mold From Bathroom Ceiling With Vinegar

Ceiling Mold Growth Learn The Cause And How To Prevent It Environix

What Causes Black Mould On Ceilings

Black Mould Removal The Right Way

How To Deal With Mould On A Bathroom Ceiling Safely

Is Black Mold On Bathroom Ceilings Dangerous Bioclean Ct


