Installing Shiplap in a Bathroom
Shiplap cladding offers a versatile and aesthetically pleasing option for bathroom walls. Its clean lines and textured surface can create a sense of spaciousness and add a touch of rustic charm or modern elegance, depending on the chosen finish. However, the humid environment of a bathroom requires careful consideration during the installation process to ensure the longevity and durability of the shiplap.
Planning and Preparation
Accurate measurements of the bathroom walls are crucial for determining the required amount of shiplap. Careful planning also involves accounting for any obstacles like windows, doors, and electrical outlets. Choosing moisture-resistant shiplap, such as pre-primed or treated wood, is highly recommended for bathroom installations. Before beginning the installation process, the walls should be clean, dry, and free of any existing wallpaper or loose paint.
Choosing the Right Shiplap
Several types of shiplap are available, each with varying degrees of moisture resistance. Traditional wood shiplap offers authentic charm but requires sealing and painting to protect against humidity. Pre-primed boards offer a convenient option, providing a base coat that simplifies the finishing process. PVC shiplap is inherently waterproof and ideal for wet areas like shower surrounds, though it may lack the authentic wood grain texture.
Acclimation and Moisture Barriers
Allowing the shiplap to acclimate to the bathroom environment for a few days before installation helps prevent warping or shrinkage after installation. This acclimation process allows the wood to adjust to the temperature and humidity of the room. Installing a moisture barrier behind the shiplap provides an additional layer of protection against moisture penetration, especially in areas prone to splashing or high humidity.
Starting the Installation
Installation typically begins at the bottom of the wall, ensuring a level starting point. A level and measuring tape are essential tools for maintaining straight lines and even spacing between boards. The first board should be positioned level and securely fastened to the wall studs using nails or screws. Consistent spacing between boards is crucial for maintaining the shiplap's signature look. Spacers can be used to ensure uniformity throughout the installation.
Working Around Obstacles
Obstacles such as electrical outlets and light switches require precise cuts in the shiplap boards. Accurate measurements and careful cutting techniques are vital for achieving a professional finish. Jigsaw or circular saw can be used for making these cuts. Remember to de-energize any electrical circuits before working near outlets or switches.
Finishing Touches
Once the shiplap installation is complete, the finishing process begins. Filling nail holes with wood filler creates a smooth, uniform surface. Caulking along the edges and seams seals any gaps and prevents moisture from seeping behind the boards. Finally, applying a coat of paint or sealant protects the shiplap and enhances its appearance. Choosing a moisture-resistant paint specifically designed for bathrooms is essential for long-lasting protection.
Maintaining Your Shiplap
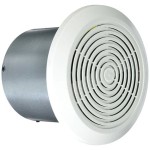
Regular cleaning with a damp cloth and mild detergent helps maintain the appearance of the shiplap. Avoid using abrasive cleaners, which can damage the finish. Proper ventilation in the bathroom also helps reduce humidity and prevents moisture buildup, extending the life of the shiplap.
Alternatives to Traditional Shiplap
Alternatives to traditional wood shiplap include PVC shiplap, shiplap wallpaper, and textured wall panels. These options offer varying degrees of moisture resistance, affordability, and ease of installation. PVC shiplap is highly water-resistant and suitable for shower areas. Shiplap wallpaper offers a budget-friendly and less labor-intensive option, while textured wall panels can mimic the look of shiplap with simplified installation procedures.

Is It Safe To Install Shiplap In A Bathroom

How To Install Shiplap In A Bathroom The Home

Is It Safe To Install Shiplap In A Bathroom

Installing Shiplap How To And Helpful Tips

Blue Shiplap Bathroom Transformation

How We Used Shiplap In A Shower Savvy Interiors San Diego

Shiplap Bathroom Ideas Install Guide B Vintage Style

One Room Challenge Spring 2024 Edition Installing Shiplap Week 4 Sustain My Craft Habit

8 Shiplap Bathroom Wall Ideas Designs Lily Ann Cabinets

How To Install Vertical Shiplap Lolly Jane
See Also
