How To Repair A Delta Bathroom Faucet
Delta bathroom faucets are known for their durability and reliability, but even the best faucets can develop problems over time. If your Delta bathroom faucet is leaking, dripping, or not functioning properly, you can usually repair it yourself with a few simple tools and a little bit of time.
The first step in repairing a Delta bathroom faucet is to identify the problem. Once you know what the problem is, you can gather the necessary tools and parts to make the repair.
Common Delta Bathroom Faucet Problems
- Leaking: A leaking faucet is one of the most common problems. Leaks can be caused by a variety of factors, including worn-out washers, damaged O-rings, or loose connections.
- Dripping: A dripping faucet is another common problem. Drips can be caused by a variety of factors, including worn-out washers, damaged O-rings, or a faulty aerator.
- Not functioning properly: If your Delta bathroom faucet is not functioning properly, it could be due to a variety of factors, including a clogged aerator, a faulty cartridge, or a broken handle.
Tools and Parts You'll Need
The tools and parts you'll need to repair a Delta bathroom faucet will vary depending on the problem. However, some common tools and parts include:- Adjustable wrench
- Phillips head screwdriver
- Flathead screwdriver
- Hex key
- Replacement washers
- Replacement O-rings
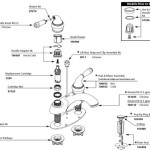
- Replacement cartridge
- Replacement handle
Step-by-Step Repair Instructions
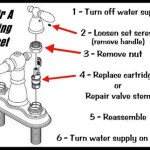
Once you have gathered the necessary tools and parts, you can follow these step-by-step instructions to repair your Delta bathroom faucet:- Turn off the water supply to the faucet. There are usually two water supply lines that run to the faucet, one for hot water and one for cold water. Turn off both of these valves by turning them clockwise.
- Remove the aerator. The aerator is the small, round piece that is located at the end of the faucet spout. It is usually held in place by a small screw. Use a screwdriver to remove the screw and then pull the aerator straight out.
- Inspect the aerator for clogs. If the aerator is clogged, it can cause the faucet to drip or leak. Clean the aerator by soaking it in a solution of white vinegar and water for a few minutes. Then, use a brush to remove any remaining debris.
- Replace the aerator. Once the aerator is clean, replace it by inserting it back into the faucet spout and tightening the screw.
- Replace the washers. If the faucet is leaking from the base of the handle, it is likely that the washers need to be replaced. To replace the washers, first remove the handle by unscrewing the set screw that is located on the underside of the handle. Then, use a wrench to remove the packing nut. The washers are located beneath the packing nut. Remove the old washers and replace them with new washers.
- Replace the O-rings. If the faucet is leaking from the spout, it is likely that the O-rings need to be replaced. To replace the O-rings, first remove the aerator. Then, use a wrench to remove the spout. The O-rings are located at the base of the spout. Remove the old O-rings and replace them with new O-rings.
- Replace the cartridge. If the faucet is not functioning properly, it is likely that the cartridge needs to be replaced. To replace the cartridge, first remove the handle. Then, use a wrench to remove the packing nut. The cartridge is located beneath the packing nut. Remove the old cartridge and replace it with a new cartridge.
- Replace the handle. If the faucet handle is broken, it can be replaced. To replace the handle, first remove the set screw that is located on the underside of the handle. Then, pull the handle straight off of the faucet stem. Replace the old handle with a new handle.
- Turn on the water supply to the faucet. Once you have made the repairs, turn on the water supply to the faucet and check for leaks.
Conclusion
Repairing a Delta bathroom faucet is a relatively easy task that can be completed in a few minutes. By following these step-by-step instructions, you can save yourself the time and expense of hiring a plumber.
How To Fix Leaky Bathroom Handle Delta Faucet Model 4530 Series Hard Water

How To Repair Leaking Dripping Delta Faucet Diyplumbing Serviceplumbing Tappplumbing

Sink Faucet Repair Delta Bathroom Drips

Simple Ways To Fix A Leaky Delta Bathroom Sink Faucet

How To Rebuild A Delta Single Handle Faucet

Delta Bathroom Faucet Repair Seats And Springs Serramar Hoa

Simple Ways To Fix A Leaky Delta Bathroom Sink Faucet

How To Fix A Leaky Delta Style Bathroom Faucet

Simple Ways To Fix A Leaky Delta Bathroom Sink Faucet

Simple Ways To Fix A Leaky Delta Bathroom Sink Faucet


