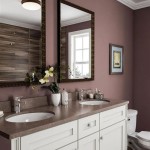
How to Paint a Bathroom Vanity Cabinet
A bathroom vanity cabinet, often the focal point of the space, can significantly impact the overall aesthetic of a bathroom. Over time, vanity cabinets can become worn, outdated, or simply no longer align with evolving design preferences. Rather than replacing the entire vanity, painting offers a cost-effective and relatively straightforward method to revitalize its appearance. This article provides a detailed guide on how to paint a bathroom vanity cabinet, ensuring a professional and long-lasting finish. Proper preparation, material selection, and application techniques are essential for achieving optimal results.
Key Point 1: Preparation is Paramount
Thorough preparation is the most crucial step in achieving a professional-looking paint job on a bathroom vanity cabinet. This stage involves cleaning, repairing, sanding, and priming the surface to ensure proper adhesion and a smooth finish. Neglecting any aspect of preparation can lead to paint chipping, peeling, or an uneven texture.
1.1 Remove Hardware and Doors/Drawers: Begin by removing all hardware, including knobs, pulls, hinges, and drawer slides. Store these items in a labeled container to avoid confusion during reassembly. Next, carefully remove the doors and drawers from the vanity cabinet. This allows for easier access to all surfaces and prevents paint from accidentally getting on the hardware or inside the cabinet. If certain hardware, such as decorative trim that's difficult to remove, needs to remain, meticulously tape it off using painter's tape.
1.2 Thorough Cleaning: Bathroom vanities are often exposed to moisture, soap scum, and other residues. Use a cleaner specifically designed for removing grease and grime, such as TSP (trisodium phosphate) or a suitable alternative. Dilute the cleaner according to the manufacturer's instructions and apply it to all surfaces of the cabinet, doors, and drawers. Use a scrub brush or sponge to agitate the cleaner and remove any stubborn stains or buildup. Rinse thoroughly with clean water and allow the surfaces to dry completely. Consider using a mildewcide solution if mold or mildew is present. Allow the mildew solution to sit for the amount of time indicated on the solution’s instruction label.
1.3 Inspection and Repairs: Once the cabinet is clean and dry, carefully inspect it for any damage, such as chips, cracks, or dents. Fill any imperfections with wood filler, following the product's instructions. Allow the filler to dry completely and then sand it smooth with fine-grit sandpaper (220-grit or higher) until it is flush with the surrounding surface. Vacuum away any sanding dust.
1.4 Sanding the Surface: Sanding creates a slightly rough surface, providing "tooth" for the primer and paint to adhere to. Begin with a medium-grit sandpaper (120-180 grit) to remove any existing gloss or imperfections. Then, switch to a finer-grit sandpaper (220-grit or higher) to smooth the surface and remove any sanding marks. Focus on sanding all surfaces, including edges, corners, and any areas that are particularly smooth or glossy. It is crucial to sand evenly to avoid creating uneven areas. For ornate or detailed areas, consider using a sanding sponge or flexible sanding pad. Vacuum away all sanding dust with a shop vacuum and then wipe down the surfaces with a tack cloth to remove any remaining dust particles. This is critical for ensuring a smooth finish.
1.5 Priming the Cabinet: Applying a primer is essential for ensuring proper adhesion of the paint and sealing the surface. Choose a high-quality primer specifically designed for use on cabinets. An oil-based primer or a stain-blocking primer is often recommended, especially if the cabinet is made of wood or has knots that could bleed through the paint. Apply the primer in thin, even coats using a brush, roller, or spray gun. Allow the primer to dry completely according to the manufacturer's instructions. Once the primer is dry, lightly sand it with fine-grit sandpaper (320-grit or higher) to smooth out any imperfections. Vacuum away the sanding dust and wipe down the surfaces with a tack cloth.
Key Point 2: Selecting the Right Paint and Applicators
Choosing the appropriate paint and application tools is crucial for achieving a durable and aesthetically pleasing finish on a bathroom vanity cabinet. The type of paint, sheen, and application method will all impact the final result.
2.1 Choosing the Right Paint: For bathroom vanities, moisture resistance is a primary consideration. Oil-based paints were traditionally favored for their durability and resistance to water, but they have higher VOCs (volatile organic compounds) and require mineral spirits for cleanup. Latex or acrylic paints are lower in VOCs and easier to clean up with water, but they may not be as durable as oil-based paints. A high-quality acrylic enamel specifically formulated for cabinets and trim is a good compromise, offering both durability and ease of use. Ensure the paint is suitable for interior use and can withstand the humidity fluctuations common in bathrooms. Consider paints specifically labeled as "cabinet paint" for optimal performance.
2.2 Selecting the Appropriate Sheen: The sheen of the paint affects its appearance and durability. Higher-sheen paints, such as semi-gloss or gloss, are more durable and easier to clean, making them a good choice for bathroom vanities. However, they also tend to highlight imperfections more readily. A satin or eggshell finish offers a more subtle sheen while still providing good durability and cleanability. Consider the overall aesthetic you are trying to achieve when selecting the sheen. A matte finish is generally not recommended for bathroom vanities due to its lack of durability and difficulty in cleaning. Experiment with samples to see how different sheens look in your bathroom's lighting.
2.3 Choosing the Right Applicators: The choice of applicators depends on the type of paint and the desired finish. For a smooth, professional finish, spraying is often the preferred method. This requires a paint sprayer and proper ventilation. If spraying is not an option, a high-quality brush and roller can also produce excellent results. Use a brush with synthetic bristles for latex or acrylic paints to prevent the bristles from absorbing water and becoming soft. A small, dense foam roller is ideal for applying paint to flat surfaces, minimizing brushstrokes and creating a smooth finish. For detailed areas, use a smaller brush with a fine point.
2.4 Preparing the Paint: Before painting, thoroughly stir the paint to ensure that the pigment is evenly distributed. If using a paint sprayer, thin the paint according to the manufacturer's instructions. Strain the paint through a paint strainer to remove any lumps or particles that could clog the sprayer or create imperfections in the finish. Proper preparation of the paint is crucial for achieving a smooth, even application.
Key Point 3: Painting Techniques and Best Practices
Applying the paint correctly is essential for achieving a professional-looking and durable finish. This includes applying thin, even coats, avoiding runs and drips, and allowing sufficient drying time between coats.
3.1 Applying Thin, Even Coats: Apply the paint in thin, even coats, avoiding excessive buildup. Over-applying paint can lead to runs, drips, and a longer drying time. Whether using a brush, roller, or sprayer, maintain a consistent application technique. When using a brush, apply the paint in long, even strokes, following the grain of the wood. When using a roller, apply the paint in a "W" pattern and then fill in the gaps, overlapping each stroke slightly to ensure even coverage. When using a sprayer, maintain a consistent distance from the surface and overlap each pass by about 50%. Multiple thin coats are always preferable to one thick coat.
3.2 Preventing Runs and Drips: To prevent runs and drips, avoid applying too much paint at once. If runs or drips do occur, immediately brush them out while the paint is still wet. Check the surface frequently for any signs of runs or drips, especially on vertical surfaces. Pay close attention to edges and corners, where paint tends to accumulate.
3.3 Sanding Between Coats: Lightly sanding between coats of paint can help to smooth out any imperfections and improve adhesion. Use fine-grit sandpaper (320-grit or higher) to gently sand the surface after each coat has dried completely. Vacuum away the sanding dust and wipe down the surfaces with a tack cloth before applying the next coat. This step is particularly important if the first coat of paint raises the grain of the wood.
3.4 Allowing Sufficient Drying Time: Allow each coat of paint to dry completely according to the manufacturer's instructions before applying the next coat. Rushing the drying process can lead to a soft, tacky finish that is easily damaged. The drying time will vary depending on the type of paint, humidity, and temperature. In general, it is best to wait at least 24 hours between coats. Ensure the room is adequately ventilated to promote proper drying.
3.5 Applying a Topcoat (Optional): For added durability and protection, consider applying a clear topcoat over the painted surface. A polyurethane or acrylic topcoat can help to protect the paint from scratches, stains, and moisture. Apply the topcoat in thin, even coats, following the same techniques as with the paint. Allow the topcoat to dry completely before reassembling the vanity.
3.6 Reassembling the Vanity: Once the paint and topcoat (if used) have dried completely, carefully reassemble the vanity. Reinstall the hardware, doors, and drawers, ensuring that everything is properly aligned and securely fastened. Use new or cleaned hardware for a refreshed look. Take care not to scratch or damage the painted surface during reassembly. Adjust hinges and drawer slides as needed to ensure smooth operation.
By following these steps and paying careful attention to detail, a homeowner can successfully paint a bathroom vanity cabinet, transforming its appearance and extending its lifespan. The investment of time and effort in proper preparation and application techniques will result in a professional and long-lasting finish that enhances the overall aesthetic of the bathroom.

How To Paint Bathroom Cabinets Without Sanding 8 Vital Steps Grace In My Space
.jpg?strip=all)
Painting A Bathroom Vanity Again Dream Green Diy

How To Quickly Paint A Bathroom Vanity Cabinet Entri Ways

How To Paint A Bathroom Vanity Love Remodeled

How To Paint Bathroom Vanity Cabinets Tutorial Beamin Moore

How To Paint Cabinets Last Painting A Bathroom Vanity Maison De Pax

Painting Bathroom Cabinets Nq Property Care

How To Paint Laminate Cabinets Love Renovations

How To Paint A Bathroom Vanity Angela Marie Made

How To Paint Bathroom Vanity Cabinets Sherwin Williams


