How to Paint a Bathroom: A Step-by-Step Guide
Painting a bathroom is a simple and affordable way to give this often-overlooked space a fresh, updated look. Whether you're a seasoned DIYer or a first-time painter, this step-by-step guide will help you achieve a professional-quality finish.
Materials You'll Need:
- Primer
- Paint
- Paint brushes or rollers
- Paint tray
- Masking tape or painter's tape
- Drop cloths or plastic sheeting
- Spackling paste or joint compound
- Sandpaper or sanding sponge
- Clean rags or cloths
- Stir stick
- Ventilation mask or respirator (optional but recommended)
Step 1: Preparation
Begin by removing all fixtures and accessories from the bathroom, including light fixtures, towel bars, and shower heads. Cover the floor and any surfaces you don't want to get paint on with drop cloths or plastic sheeting. Use masking tape to protect areas such as around the edges of the walls, molding, and windows.
Step 2: Repair and Clean
Inspect the walls and ceiling for any cracks, holes, or uneven surfaces. Fill in any imperfections with spackling paste or joint compound and smooth them out with sandpaper or a sanding sponge. Wipe down the walls and ceiling with a clean damp rag to remove any dust or dirt.
Step 3: Prime
Applying a primer is crucial to ensure that the paint adheres properly and creates a more durable finish. Use a high-quality primer specifically designed for bathrooms, which can help resist moisture and mildew. Apply the primer using a paint brush or roller, ensuring you cover the entire surface evenly.
Step 4: Paint
Once the primer has dried, you can start painting. Choose a paint color and sheen that complements your bathroom's style and fixtures. For high-moisture areas like showers or near the sink, consider using a mildew-resistant paint. Apply the paint in thin, even coats, allowing each coat to dry thoroughly before applying the next.
Step 5: Detail Work
After the first coat has dried, remove the masking tape and fill in any gaps or missed spots. Use a smaller brush to paint around edges and corners, ensuring you have a clean and precise finish. If necessary, apply a second or third coat of paint until you are satisfied with the coverage and opacity.
Step 6: Touch-Ups and Cleanup
Once the paint is completely dry, inspect the bathroom for any imperfections or drips. Touch up any areas as needed and remove any remaining tape or plastic sheeting. Clean your brushes or rollers thoroughly with the appropriate solvent or cleaner and store them properly for future use.
Additional Tips:
- Ensure adequate ventilation by opening windows or using an exhaust fan during painting.
- Always stir the paint thoroughly before using it.
- Avoid overbrushing or rolling, as this can create brush marks or streaks.
- Allow sufficient drying time between coats, following the manufacturer's instructions.
- If you have any doubts or encounter unforeseen issues, don't hesitate to consult with a professional painter or decorator.
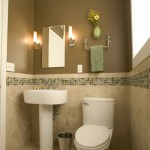
With careful preparation and attention to detail, you can achieve a beautiful, fresh-looking bathroom that will last for years to come.
/how-to-paint-your-bathroom-the-right-way-1822373-hero-e3e00031bccc41ab8d90293acda95695.jpg?strip=all "How To Paint A Bathroom The Right Way")
How To Paint A Bathroom The Right Way

How To Paint A Bathroom 15 Steps With S Wikihow

How To Paint A Bathroom Ace Hardware

How To Paint A Bathroom Important Tip Avoid Ling And Best Anti Moisture Formula Express Co

How To Paint A Bathroom With Sprayer Green Decor

How To Paint A Bathroom Ace Hardware

What Color Should I Paint My Bathroom

How To Paint A Bathroom 15 Steps With S Wikihow

I Painted Our Wooden Bathroom Vanity What Learned Diy Tips Before Afters

Yes You Can Paint Your Bathtub And Tile Here S How Toolbox Divas