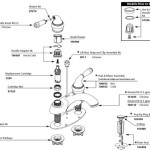
How to Install a Bathroom Faucet
A bathroom faucet is an essential component of any bathroom. It provides a source of water for washing hands, brushing teeth, and other activities. If you're looking to update your bathroom's style or replace a worn-out faucet, installing a new one is a relatively simple project that can be completed in a few hours.
Here's a step-by-step guide to help you install a bathroom faucet:
Tools You'll Need:
- Adjustable wrench
- Faucet wrench
- Plumber's putty or Teflon tape
- Screwdriver
- Allen wrench or hex key
- Bucket or bowl
- Rags
Steps:
1. Shut Off the Water Supply
Before you begin, shut off the water supply to your bathroom. There should be two shut-off valves located under the sink, one for hot water and one for cold water. Turn both valves clockwise to the closed position.
2. Remove the Old Faucet
To remove the old faucet, you'll need to disconnect the water supply lines and the faucet base. Use an adjustable wrench to loosen the nuts that connect the supply lines to the faucet. Be careful not to overtighten the nuts, as this could damage the lines.
Once the supply lines are disconnected, use a screwdriver to remove the screws that hold the faucet base in place. Lift the faucet straight up to remove it from the sink.
3. Clean the Sink Surface
Before installing the new faucet, clean the surface of the sink where the faucet base will be mounted. Use a damp cloth to wipe away any dirt or debris.
4. Apply Plumber's Putty or Teflon Tape
Apply a ring of plumber's putty or Teflon tape around the base of the new faucet. This will help to create a watertight seal between the faucet and the sink.
5. Install the Faucet Base
Align the faucet base with the mounting holes in the sink. Hold the base in place and insert the mounting screws. Tighten the screws until the faucet base is secure.
6. Connect the Water Supply Lines
Connect the hot and cold water supply lines to the corresponding ports on the faucet. Use an adjustable wrench to tighten the nuts that connect the lines to the faucet. Be careful not to overtighten the nuts, as this could damage the lines.
7. Secure the Handles
Insert the handles into the corresponding holes on the faucet. Use an Allen wrench or hex key to tighten the set screws that hold the handles in place.
8. Turn on the Water Supply
Turn on the water supply valves under the sink and check for leaks. If there are any leaks, tighten the nuts or screws that connect the faucet to the sink or the water supply lines. Then turn off the water supply again and retighten the nuts or screws by a quarter turn.
9. Finish Up
Turn on the water supply again and check for leaks one last time. If there are no leaks, the faucet is installed correctly. Wipe away any excess water or putty from the sink and faucet.
Congratulations! You have successfully installed a new bathroom faucet.

How To Install A Bathroom Faucet By Delta

How To Replace A Bathroom Faucet Tinged Blue

Installation Instructions For Bathselect Crimea Antique Brass Dual Handled Bathroom Sink Faucet

How To Replace A Bathroom Faucet Home Repair Tutor

How To Install A Bathroom Faucet Diy Guide

Removing And Installing Bathroom Faucets The Lazy Way Makely

How To Remove And Install A Bathroom Faucet

How To Install Huaraz Deck Mount Bathroom Sink Faucet

How To Remove And Install A Bathroom Faucet

How To Replace A Bathroom Faucet Tinged Blue
See Also


