How to Repair a Bathroom Fan
A functioning bathroom fan is essential for preventing moisture buildup and promoting proper ventilation in your bathroom. If your bathroom fan stops working, it can lead to several issues, including mold growth, mildew, and unpleasant odors.
Fixing a bathroom fan is a relatively straightforward task that most homeowners can tackle with basic tools and materials. However, it's important to approach the repair with caution, as working with electrical components can be dangerous if not handled properly.
Step 1: Safety First
Before beginning any electrical work, it's crucial to turn off the power at the fuse box or circuit breaker panel. This will prevent the risk of electrical shock or fire. Also, wear safety glasses and work gloves for added protection.
Step 2: Inspect the Fan
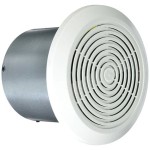
Once the power is off, remove the fan grille or cover to access the fan motor. Inspect the fan blades for any obstructions or damage. If the blades are blocked, use a vacuum cleaner to remove any dust or debris.
Step 3: Check the Motor
If the fan blades are clear of obstructions, check the motor for any signs of damage or wear. Look for any loose wires, burnt-out components, or unusual noises when you turn the fan on.
Step 4: Test the Capacitor
If the motor looks okay, test the capacitor. The capacitor is a small, cylindrical component that helps start the fan motor. To test it, use a multimeter set to the capacitance range. A good capacitor will typically have a capacitance reading within the range specified on the capacitor itself.
Step 5: Replace the Capacitor (if necessary)
If the capacitor is faulty, it will need to be replaced. Make sure to purchase a capacitor with the same voltage and capacitance rating as the original. To replace the capacitor, disconnect the wires from the old capacitor and connect them to the new one. Ensure the wires are securely fastened and insulated.
Step 6: Test the Fan Again
Once the new capacitor is installed, turn the power back on and test the fan. If the fan starts running smoothly, the repair is successful.
Step 7: Troubleshooting Other Issues
If the fan still doesn't work after replacing the capacitor, there may be other underlying issues. Check the following:
- Wiring: Ensure that all the wires are properly connected and free of damage.
- Switch: Test the switch that controls the fan to ensure it's working correctly.
- Power Source: Verify that the fan is receiving power by testing the outlet or circuit breaker.
Additional Tips
Here are a few additional tips for maintaining and repairing bathroom fans:
- Clean the fan regularly: Remove the grille or cover and vacuum any dust or debris from the fan blades and motor.
- Lubricate the motor: Occasionally, apply a few drops of light machine oil to the motor shaft to reduce friction.
- Replace the fan every 5-10 years: Like any other electrical appliance, bathroom fans have a limited lifespan. It's recommended to replace the fan every 5-10 years for optimal performance and efficiency.
Conclusion
Fixing a bathroom fan is a manageable task that can save you money and hassle. By following these steps and taking necessary safety precautions, you can restore your bathroom fan to proper working order and enjoy a well-ventilated and moisture-free bathroom.

Blog

How To Replace And Install A Bathroom Exhaust Fan From Start Finish For Beginners Easy Diy

How To Replace And Install A Bathroom Exhaust Fan From Start Finish For Beginners Easy Diy

How To Replace And Install Broken Bathroom Exhaust Fan Motor Easy Diy Fix Noisy Rattling

How To Fix A Noisy Bathroom Exhaust Fan Easy Project

Is Your Bathroom Exhaust Fan Working Efficiently Multi Trade Building Services

Bathroom Fan Stopped Working Or Noisy How To Fix

Why Is Water Dripping From My Bathroom Fan Family Handyman

I Ve Got A 1970s Era House That Bought 3 Years Ago With Non Functional Bathroom Fan In General Is This The Sort Of Thing To Have Professional Install New

Bath Fan Broke You Can Fix It


