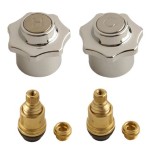
How to Fix a Faucet Handle in the Bathroom
A dripping or malfunctioning faucet handle in the bathroom can lead to wasted water, increased water bills, and potential damage to bathroom fixtures. Addressing faucet handle issues promptly is crucial to prevent further complications. This article provides a comprehensive guide on diagnosing common problems associated with bathroom faucet handles and detailing effective repair strategies.
Identifying Common Faucet Handle Problems
Before attempting any repairs, accurate identification of the problem is paramount. Several common issues can affect faucet handle functionality. These include:
Dripping Faucet: A persistent drip from the faucet spout even when the handle is fully turned off is a common indicator of a worn-out or damaged component within the faucet assembly. The issue can often be traced back to worn washers, O-rings, or cartridge seals.
Stiff or Difficult to Turn Handle: A handle that is difficult to turn may be caused by mineral buildup around the cartridge or valve stem, corrosion on the moving parts, or a damaged cartridge. Lack of lubrication can also contribute to this problem.
Loose or Wobbly Handle: A loose handle indicates that the screw securing it to the valve stem has loosened or is stripped. In some cases, the handle itself may be cracked or broken.
Handle Spins Without Affecting Water Flow: If the handle spins freely without engaging the valve stem, it suggests a broken or stripped connection between the handle and the stem. This can be due to a damaged stem, stripped screw threads, or a broken handle adapter.
Water Leaks Around the Handle Base: Water leaking from around the base of the handle usually signifies that the O-rings or seals surrounding the valve stem are worn or damaged. Replacement of these seals is typically required.
Required Tools and Materials
Having the necessary tools and materials readily available is essential for a smooth and efficient repair process. The specific items needed may vary depending on the type of faucet and the nature of the problem. However, the following list represents a common toolkit for faucet handle repairs:
Adjustable Wrench: Used to loosen and tighten nuts and fittings of various sizes.
Screwdrivers (Phillips and Flathead): Required for removing screws that secure the handle, escutcheon, and other faucet components.
Pliers (Regular and Needle-Nose): Helpful for gripping small parts, removing O-rings, and maneuvering within tight spaces.
Allen Wrench Set: Some faucet models use Allen screws to secure the handle. A set of Allen wrenches in various sizes is necessary to address these.
Penetrating Oil: Facilitates the loosening of corroded or stuck components.
White Vinegar: Effective for dissolving mineral deposits that may be hindering handle movement.
Plumber's Grease: Used to lubricate faucet components, ensuring smooth operation and preventing future corrosion.
Replacement Parts: New washers, O-rings, cartridges, or handles, as needed, based on the diagnosed problem. Identification of the faucet brand and model is crucial for purchasing the correct replacement parts.
Clean Rags or Towels: For cleaning up spills and protecting surfaces.
Basin Wrench (Optional): Useful for accessing and removing the faucet from underneath the sink if necessary.
Step-by-Step Repair Procedures
The following sections outline detailed procedures for addressing the common faucet handle problems identified earlier. Always shut off the water supply to the faucet before commencing any repairs. Locate the shut-off valves under the sink, typically one for hot water and one for cold water. Turn both valves clockwise until they are fully closed.
Repairing a Dripping Faucet: The source of a dripping faucet often lies within the valve assembly. The repair process varies depending on the faucet type (compression, ball, cartridge, or ceramic disc). However, a general approach involves:
Covering the sink drain to prevent small parts from falling in.
Removing the faucet handle by loosening the set screw or unscrewing the handle.
Disassembling the faucet components, including the escutcheon, retaining nut, and valve stem or cartridge.
Inspecting the washers, O-rings, and seals for wear or damage.
Replacing any worn or damaged components with identical replacements.
Lubricating the moving parts with plumber's grease.
Reassembling the faucet in reverse order.
Turning the water supply back on and testing for leaks.
For cartridge faucets, the entire cartridge is typically replaced. For compression faucets, replacing the valve seat may also be necessary if it is corroded or damaged. Refer to the faucet manufacturer's instructions or online resources for specific guidance on disassembling and reassembling particular faucet models.
Addressing a Stiff or Difficult-to-Turn Handle: Mineral buildup or corrosion is commonly the culprit behind a stiff faucet handle. To address this issue:
Remove the faucet handle as described above.
Disassemble the faucet to access the valve stem or cartridge.
Soak the affected parts in white vinegar for several hours to dissolve mineral deposits. For severe buildup, overnight soaking may be required.
Use a small brush or cloth to scrub away the loosened deposits.
Apply penetrating oil to the moving parts to lubricate them and loosen any remaining corrosion.
Apply plumber's grease to the valve stem or cartridge before reassembling the faucet.
Reassemble the faucet and test the handle for smooth operation.
If the handle remains stiff after cleaning and lubricating, the cartridge may be damaged and require replacement.
Fixing a Loose or Wobbly Handle: A loose faucet handle is often a simple fix. The process typically involves:
Locating the set screw that secures the handle to the valve stem. The screw may be hidden under a decorative cap or cover.
Tightening the set screw with the appropriate screwdriver or Allen wrench.
If the set screw is stripped, replacing it with a new screw of the same size is necessary.
If the handle itself is cracked or broken, it must be replaced entirely.
In some cases, the valve stem may be damaged, preventing the handle from tightening properly. If this is the case, the valve stem will need to be replaced.
Repairing a Handle That Spins Freely: A handle that spins without engaging the valve stem indicates a broken connection between the two. The repair process depends on the specific design of the faucet, but commonly involves:
Removing the faucet handle.
Inspecting the valve stem and the handle adapter for damage. The adapter is the component that connects the handle to the stem.
Replacing any broken or stripped parts. This may include the valve stem, the handle adapter, or the handle itself.
Ensuring that the replacement parts are compatible with the faucet model.
Reassembling the faucet and testing the handle for proper engagement.
If the valve stem is severely damaged, replacing the entire faucet may be the most practical solution.
Stopping Water Leaks Around the Handle Base: Water leaking from around the base of the handle signifies worn or damaged O-rings or seals. The repair involves:
Removing the faucet handle.
Disassembling the faucet to access the valve stem.
Carefully removing the old O-rings from the valve stem using a small pick or needle-nose pliers.
Cleaning the valve stem and the surrounding area.
Lubricating the new O-rings with plumber's grease.
Installing the new O-rings onto the valve stem.
Reassembling the faucet and testing for leaks.
Ensuring the correct size and type of O-ring is crucial for a successful repair. Refer to the faucet manufacturer's specifications or consult with a plumbing supply store for assistance.
Preventative Maintenance
Implementing preventative maintenance measures can significantly extend the lifespan of bathroom faucets and minimize the need for repairs. Regular cleaning of the faucet handles and surrounding areas can help prevent mineral buildup and corrosion. Using a mild soap and water solution followed by a thorough rinsing is sufficient for most cleaning needs. Avoid using abrasive cleaners, as they can damage the faucet finish.
Periodically lubricating the moving parts of the faucet handle, such as the valve stem or cartridge, with plumber's grease can ensure smooth operation and prevent stiffness. This is especially important in areas with hard water, which can accelerate mineral buildup.
Promptly addressing any minor leaks or drips can prevent them from escalating into more significant problems. Regularly inspecting the faucet for signs of wear or damage, such as cracks or corrosion, can allow for early intervention and prevent costly repairs.
By adhering to these preventative maintenance practices, homeowners can prolong the life of their bathroom faucets and avoid the inconvenience and expense of frequent repairs.

How To Change The Handle Rotation On A Faucet

How Do I Replace Bathroom Sink Faucet Handles Cleaning More

How To Tighten Faucet Handle Homeserve Usa

How To Fix A Stripped Faucet Handle In 10 Minutes Or Less Ricks Plumbing

Tighten A Loose Lever On Moen Brantford Faucet

How To Remove Moen Bathroom Faucet Handle In 2 Steps

How To Fix A Stripped Faucet Handle In 10 Minutes Or Less

How To Fix A Leaking Bathtub Faucet Diy Family Handyman

How To Fix A Leaky Bathroom Sink Faucet

Bathroom Faucet Handles Loose Wobbly Diy Fix
See Also


