How To Fix Bathroom Faucet Handle
A dripping or leaking faucet is not only annoying but can also waste a significant amount of water. If you're facing this issue, don't worry - fixing a bathroom faucet handle is a relatively simple task that you can easily do yourself. Here's a step-by-step guide to help you get started.
Tools and Materials Needed:
Before you begin, gather the following tools and materials:
- Adjustable wrench
- Phillips head screwdriver
- Flat head screwdriver
- Replacement faucet handle (if necessary)
- Paper towels or rags
Step-by-Step Instructions:
1. Turn Off the Water Supply
The first step is to turn off the water supply to the faucet. This is typically done by turning the shut-off valves located under the sink. If there are no shut-off valves, you will need to turn off the main water supply to your home.
2. Remove the Handle Screw
Once the water supply is turned off, locate the screw that holds the faucet handle in place. This screw is usually located at the base of the handle, underneath a small cap. Use a Phillips head screwdriver to remove the screw.
3. Remove the Handle
Once the screw is removed, carefully pull the handle straight up to remove it from the faucet stem. If the handle is stuck, you can use a flat head screwdriver to gently pry it loose.
4. Inspect the Faucet Stem
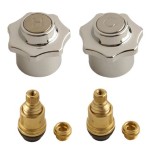
Once the handle is removed, you will see the faucet stem. The stem is the part of the faucet that controls the flow of water. Inspect the stem for any damage or wear. If the stem is damaged, it will need to be replaced.
5. Replace the Faucet Handle
If the faucet stem is in good condition, you can now replace the faucet handle. Align the new handle with the stem and carefully push it down until it is securely in place. Tighten the handle screw to secure it.
6. Turn on the Water Supply
Once the handle is replaced, turn the water supply back on. Check for any leaks around the handle. If there are any leaks, tighten the handle screw further.
7. Check for Leaks
Once the water supply is turned back on, run the faucet for a few minutes to check for any leaks. If there are no leaks, the repair is complete.
Tips:
Here are a few tips to help you fix a bathroom faucet handle:
- If the faucet handle is stuck, do not force it. Use a flat head screwdriver to gently pry it loose.
- If the faucet stem is damaged, it is best to replace it. A damaged stem can cause leaks and other problems.
- When replacing the faucet handle, make sure to align it correctly with the stem. An improperly aligned handle can cause leaks.
- If you are not comfortable fixing the faucet handle yourself, call a licensed plumber for help.
Conclusion:
Fixing a bathroom faucet handle is a relatively simple task that can be done in a few minutes. By following the steps outlined in this guide, you can save yourself the cost of hiring a plumber and get your faucet working properly again.

How Do I Replace Bathroom Sink Faucet Handles Cleaning More

How To Tighten A Bathroom Faucet Handle

How To Tighten Faucet Handle Homeserve Usa

How To Fix A Leaky Faucet Handle

How To Fix A Stripped Faucet Handle In 10 Minutes Or Less Ricks Plumbing

How To Fix A Leaking Bathtub Faucet Diy Family Handyman

How To Remove Moen Bathroom Faucet Handle In 2 Steps

Bathroom Faucet Handles Loose Wobbly Diy Fix

How To Repair A Single Handle Kitchen Faucet Diy Family Handyman

How To Fix A Stripped Faucet Handle In 10 Minutes Or Less
See Also


