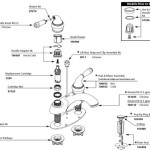
How To Attach Bathroom Sink To Vanity
When it comes to bathroom renovations, one of the most important steps is attaching the sink to the vanity. This may seem like a simple task, but there are actually a few things you need to keep in mind to ensure a proper installation. In this article, we will provide you with a step-by-step guide on how to attach a bathroom sink to a vanity, so you can get the job done right the first time.
Step 1: Gather Your Tools and Materials
Before you begin, you will need to gather the following tools and materials:
- Bathroom sink
- Vanity
- Sink flange
- Putty knife
- Caulk gun
- Caulk
- Plumber's putty
- Wrench
- Screwdriver
Step 2: Prepare the Vanity
The first step is to prepare the vanity for the sink. This involves cutting out the hole for the sink and installing the sink flange.
To cut out the hole for the sink, you will need to measure the diameter of the sink and trace it onto the vanity top. Once you have traced the outline, use a jigsaw to cut out the hole.
Once the hole is cut out, you will need to install the sink flange. The sink flange is a metal ring that fits around the drain hole and helps to secure the sink to the vanity.
Step 3: Apply Plumber's Putty
The next step is to apply plumber's putty to the sink flange. Plumber's putty is a type of sealant that helps to create a watertight seal between the sink and the vanity.
To apply plumber's putty, roll it out into a rope and then place it around the inside of the sink flange. Make sure to press the putty firmly into place.
Step 4: Place the Sink
Once the plumber's putty is in place, you can place the sink in the hole in the vanity top. Make sure to center the sink and press it down firmly so that the putty creates a seal.
Step 5: Tighten the Sink
Once the sink is in place, you will need to tighten the nuts that hold the sink flange in place. Use a wrench to tighten the nuts until they are snug.
Step 6: Caulk the Sink
The final step is to caulk the sink. Caulk is a type of sealant that helps to keep water from leaking out from around the sink.
To caulk the sink, apply a bead of caulk around the perimeter of the sink where it meets the vanity top. Use your finger to smooth out the caulk and create a neat finish.
Conclusion
Attaching a bathroom sink to a vanity is a relatively simple task, but it is important to follow the steps carefully to ensure a proper installation. By following the steps outlined in this article, you can be sure that your sink will be securely attached and will not leak.

How To Install A Bathroom Vanity

How To Install A Bathroom Vanity

12 Easy Steps To Install Bathroom Vanity And Sink

How To Install Or Remove A Bathroom Vanity Homeserve Usa


The 9 Steps For Installing A Bathroom Vanity Ryan Old Plumbing

Tutorial How To Install A Bathroom Vanity The Diy Playbook

How To Install A Vanity Forbes Home

Replace Vanity Top And Faucet Diy Network

Bathroom Vanity Installation Tips Newsnews


