Fixing a Leaky Bathroom Faucet
A dripping faucet is a common household nuisance. Beyond the annoying sound, a leaky faucet wastes water and increases utility bills. Fortunately, most leaks are relatively simple to fix with basic tools and a little patience. This article provides a guide to repairing common bathroom faucet leaks, empowering homeowners to address this issue effectively.
Identifying the Source of the Leak
Before beginning any repair, it's crucial to pinpoint the leak's origin. Different locations require distinct solutions. Common leak sources include the faucet handle, the spout, or the base of the tap where it connects to the sink or countertop. Careful observation and sometimes a dry cloth to isolate the dripping area are helpful in determining the precise source.
Once the source is identified, it's essential to turn off the water supply to the faucet. Locate the shut-off valves under the sink. There will be separate valves for hot and cold water. Turn both valves clockwise to shut off the water flow. Turn on the faucet to release any remaining water pressure in the lines.
Gathering the Necessary Tools and Materials
Having the right tools readily available simplifies the repair process. Commonly required tools include a flathead screwdriver, a Phillips head screwdriver, an adjustable wrench, and pliers. Depending on the faucet type and the specific repair, specialized tools like a basin wrench or cartridge puller might also be necessary. It's recommended to have a small bucket or container on hand to catch any spilled water.
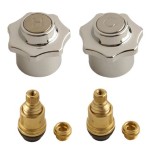
In addition to tools, gather replacement parts appropriate for the faucet. These might include O-rings, washers, cartridges, or valve seats. If the faucet is older or the type is unknown, it's often beneficial to take the old parts to a hardware store to ensure purchasing the correct replacements.
Repairing a Two-Handle Faucet Leak
Two-handle faucets, with separate controls for hot and cold water, often leak at the handle or the base of the spout. For handle leaks, the problem often lies with worn-out O-rings or seals. After turning off the water supply, remove the decorative cap on the handle, usually by prying it up with a flathead screwdriver. Unscrew the handle and remove it. Inspect the O-rings and other seals for wear and tear. Replace any damaged components with new ones, ensuring they are the correct size and type for the faucet model.
If the leak originates from the base of the spout, the problem is usually a worn-out O-ring inside the spout. The spout typically unscrews from the faucet body. Use a wrench or pliers to loosen and remove the spout. Inspect the O-ring and replace it if necessary. Reassemble the spout and handles, ensuring all connections are tight.
Repairing a Single-Handle Faucet Leak
Single-handle faucets often utilize a cartridge that controls both water flow and temperature. Leaks in these faucets commonly stem from a worn-out cartridge. After shutting off the water and releasing the pressure, remove the handle. The method for removing the handle varies depending on the faucet model, but typically involves removing a screw or cap and then pulling the handle off. Once the handle is removed, the cartridge can be accessed. A cartridge puller tool may be necessary to extract the cartridge.
Take the old cartridge to a hardware store to ensure purchasing the correct replacement. Install the new cartridge, taking care to align it correctly. Reassemble the handle and other components, ensuring all connections are secure. Turn the water supply back on slowly and check for leaks.
Addressing Leaks at the Base of the Faucet
Leaks occurring at the base of the faucet, where it connects to the sink or countertop, can indicate a problem with the mounting nuts or the supply lines. Tightening the mounting nuts with a basin wrench might resolve the issue. If the leak persists, inspect the supply lines for cracks or damage. Replace any damaged supply lines with new ones, ensuring proper connection to both the faucet and the shut-off valves.
After any repair, it is vital to thoroughly test the faucet for leaks. Turn the water supply back on slowly and observe carefully for any drips or signs of leakage. Check both hot and cold water lines. If a leak persists, re-evaluate the repair steps and ensure all connections are secure and all worn parts are replaced.
Preventing Future Leaks
Regular maintenance can help prevent future faucet leaks. Periodically inspect the faucet for signs of wear and tear. Avoid using excessive force when operating the handles. Ensure that the water pressure in the home is not excessively high. Addressing minor issues promptly can prevent them from developing into more significant problems requiring extensive repairs.

How To Fix A Leaky Faucet True Value

How To Fix A Leaky Faucet The Home

How To Fix A Leaking Bathtub Faucet Diy Family Handyman

Properly Fixing A Leaky Sink Faucet Wallside Windows

How To Fix A Leaky Faucet The Home

How To Fix A Leaky Faucet Guides For Every Design And Style

How To Fix A Leaky Faucet Guides For Every Design And Style

Part 1 Of 2 How To Fix A Dripping Faucet

How To Fix A Leaky Faucet Forbes Home

How To Fix A Leaky Faucet Handle
See Also


