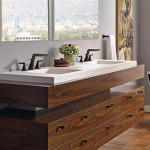
Converting Your Bathroom to Handicap Accessible
Making your bathroom handicap accessible is a valuable investment for both the present and the future. Whether you are adapting your home for a loved one with mobility challenges, preparing for aging in place, or simply increasing the functionality and safety of your bathroom, this project is a worthwhile endeavor. This article will guide you through the key elements of converting a bathroom to meet handicap accessibility standards, enabling you to create a safe and comfortable space for all.
1. Understanding Accessibility Standards
Before embarking on any renovations, it is crucial to understand the relevant accessibility standards. The Americans with Disabilities Act (ADA) provides comprehensive guidelines for public facilities, while the Americans with Disabilities Act Accessibility Guidelines (ADAAG) encompass standards for private residences. These guidelines cover various aspects, including:
- Doorways: Minimum clear width of 32 inches, with lever-style handles.
- Toilets: Height of 17-19 inches from the floor, with grab bars on both sides.
- Shower stalls: Minimum clear floor space of 30x30 inches, with a seat and grab bars.
- Sinks: Height of 34 inches from the floor, with knee space underneath.
- Flooring: Non-slip and easy to clean, with a smooth transition between different floor levels.
While adhering to these standards may seem daunting, many of them can be incorporated with relatively simple modifications. Consult with a qualified contractor or accessibility specialist to ensure your renovations comply with the relevant regulations and meet your specific needs.
2. Essential Modifications for Accessibility
Converting a bathroom to handicap accessible typically involves a range of modifications that address common accessibility challenges. These include:
2.1. Doorways and Entryways
Widening doorways to 32 inches or more will allow wheelchair users to navigate freely. This may require removing door trim or replacing the door frame altogether. Consider using a swinging door rather than a sliding door, as they offer a wider opening. If the entryway is on a step, installing a ramp with proper slope and handrails will ensure safe and easy access.
2.2. Toilet and Bathroom Fixtures
Replacing a standard toilet with a raised toilet, ideally between 17-19 inches high, provides a more comfortable and accessible seating height. Additionally, installing grab bars on both sides of the toilet offers stability for standing and sitting safely. If possible, relocate the toilet to create a larger clear space for maneuvering.
Handicap-accessible sinks typically feature greater knee space underneath and a lower countertop height of 34 inches. Consider installing a faucet with lever handles for easier operation. These features can greatly improve comfort and ease of use for individuals with limited mobility.
2.3. Shower and Bathing Accessibility
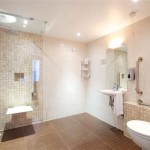
Creating a handicap-accessible shower involves several crucial modifications. A walk-in shower eliminates the need for a step or threshold, making it accessible for wheelchair users. A shower seat provides a place to rest during a shower, promoting comfort and safety. Install grab bars strategically throughout the shower area, ensuring easy access to the showerhead, seat, and door. Finally, choose non-slip flooring to prevent falls.
3. Additional Considerations for Customization
Beyond the core accessibility standards, you can further enhance your bathroom's functionality and comfort with additional considerations. These might include:
- Adaptive Controls: Installing electronic controls for faucets, lights, and even exhaust fans simplifies access and operation for those with dexterity limitations.
- Storage Solutions: Consider using adjustable shelving and pull-out drawers to create easily accessible storage for toiletries and medications.
- Lighting: Adequate lighting is essential for visibility and safety, especially when navigating the bathroom at night. Use a mix of overhead and task lighting, ensuring brightness and glare-free illumination.
- Color and Contrast: Use contrasting colors for walls, flooring, and fixtures, especially in areas with potential hazards like the shower. This aids in visual clarity and reduces the risk of falls.
These additional features can create a more user-friendly and adaptable environment, catering to individual needs and preferences. Remember, the goal is to make your bathroom a safe, comfortable, and functional space for everyone.

How To Design A Wheelchair Accessible Shower And Bathroom Innovate Building Solutions

Transforming Your Bathroom To Be Handicap Accessible R D Marble Inc

Handicap Bathroom Remodeling Age In Place Design

How To Make A Bathroom Handicap Accessible

How To Convert A Bathroom For Ada Handicap Accessibility

The Ultimate Guide To Accessible Bathroom Remodeling For Handicap Accessibility Bay State

Handicap Bathroom Remodeling Age In Place Design

Handicap Accessible Roll In Shower Pans Wet Rooms Innovate Building Solutions

Accessible Roll In Showers Installed Lifeway Mobility

Usm Shower Roll In Conversion Kit Walk Baths
