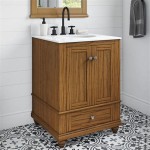
Chalk Paint on Bathroom Vanity: A Simple Guide to Transform Your Bathroom
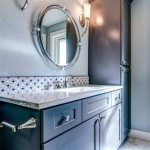
Chalk paint has become increasingly popular in recent years for its versatility and ability to transform furniture and decor pieces. It is a type of matte paint that gives a unique, chalky finish resembling the texture of a chalkboard. Chalk paint on bathroom vanity can add a touch of vintage charm, elegance, or even a pop of color to your bathroom. This article provides a detailed guide on how to paint a bathroom vanity with chalk paint and achieve a professional-looking finish.
Materials you will need:
- Chalk paint
- Sandpaper (120-grit and 220-grit)
- Clean rags or cloths
- Primer (optional)
- Paintbrush or roller
- Wax or polyurethane sealant
- Screwdriver or drill (for removing hardware)
Step-by-Step Instructions:
1. Prepare the Vanity:
Remove all hardware, such as handles, knobs, and drawer pulls, from the vanity. Thoroughly clean the vanity surface with a damp cloth to remove any dirt or debris. Allow it to dry completely.
2. Sanding:
Lightly sand the vanity surface with 120-grit sandpaper to create a rougher surface for the paint to adhere to. Wipe away any dust with a clean cloth.
3. Priming (Optional):
If desired, apply a coat of primer to the vanity surface. This step helps to improve paint adhesion and prevent staining. Allow the primer to dry completely before proceeding.
4. Apply the First Coat of Chalk Paint:
Use a paintbrush or roller to apply a thin, even coat of chalk paint to the vanity surface. Allow it to dry completely according to the manufacturer's instructions.
5. Sanding Between Coats:
Once the first coat is dry, lightly sand the surface with 220-grit sandpaper. This helps to smooth out the finish and create a better surface for the next coat.
6. Apply the Second Coat:
Apply a second coat of chalk paint and allow it to dry completely.
7. Seal the Finish:
To protect the chalk paint finish, apply a coat of wax or polyurethane sealant. Wax provides a matte finish, while polyurethane gives a more durable, glossy finish. Allow the sealant to dry and cure according to the manufacturer's instructions.
8. Reassemble the Vanity:
Once the finish is completely dry, reattach the hardware and drawer pulls.
Tips for Success:
- Use a high-quality chalk paint for best results.
- Apply thin, even coats of paint and allow each coat to dry completely before applying the next.
- Lightly sand between coats to create a smoother finish.
- Protect the painted surface with a wax or polyurethane sealant.
- Chalk paint can be distressed for a vintage look by sanding the edges or creating decorative effects with a damp cloth.
Conclusion:
Painting a bathroom vanity with chalk paint is a relatively simple and inexpensive way to update your bathroom decor. By following the steps outlined in this guide, you can achieve a professional-looking finish that will add a touch of charm and elegance to your space. Whether you choose a classic white, a bold color, or a distressed finish, chalk paint on bathroom vanity can transform your bathroom into a more stylish and inviting retreat.

Bathroom Vanity Makeover With Chalk Paint Decor Adventures

Bathroom Vanity Makeover With Chalk Paint Decor Adventures

Chalk Painted Bathroom Vanity Makeover Our Storied Home

Chalk Paint Cabinets Bathroom Renovation

Bathroom Vanity Makeover With Annie Sloan Chalk Paint

Bathroom Vanity Makeover With Chalk Paint Decor Adventures

Chalk Paint Cabinets Bathroom Renovation

How To Completely Change Bathroom Cabinets With Paint Roots Wings Furniture Llc

Chalk Paint Bathroom Vanity Makeover Remodelaholic

Bathroom Vanity Transformation With Diy Chalk Type Paint
See Also
