Replacing Exhaust Fan In Bathroom
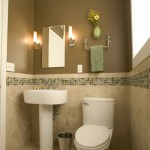
The exhaust fan in your bathroom is an important part of keeping the air clean and fresh. It helps to remove moisture, odors, and pollutants from the air, and it can also help to prevent mold and mildew growth. If your exhaust fan is not working properly, it can lead to a number of problems, including increased humidity, poor air quality, and respiratory problems.
Replacing an exhaust fan is a relatively simple task that can be completed in a few hours. However, it is important to follow the manufacturer's instructions carefully to ensure that the fan is installed properly. Here are the steps on how to replace an exhaust fan in your bathroom:
1. Safety First
Before you begin, make sure to turn off the power to the exhaust fan at the circuit breaker. You should also remove the light bulb from the fixture to avoid any electrical shock.
2. Remove the Old Fan
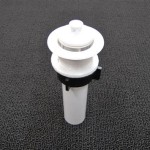
Once the power is off, you can remove the old fan. Most exhaust fans are held in place by a few screws. Once the screws are removed, you should be able to pull the fan out of the housing.
3. Clean the Housing
Once the old fan is removed, you should clean the housing to remove any dust or debris. You can use a damp cloth or a vacuum cleaner to clean the housing.
4. Install the New Fan
Once the housing is clean, you can install the new fan. Most new exhaust fans come with a template that you can use to mark the location of the mounting screws. Once the screws are in place, you can push the fan into the housing until it is flush with the wall.
5. Wire the Fan
Once the fan is in place, you need to wire it to the electrical circuit. Most exhaust fans have a black wire, a white wire, and a green wire. The black wire is the hot wire, the white wire is the neutral wire, and the green wire is the ground wire. Connect the black wire to the black wire in the electrical circuit, the white wire to the white wire, and the green wire to the green wire.
6. Install the Light Bulb
Once the fan is wired, you can install the light bulb. Most exhaust fans use a standard light bulb, but you should check the manufacturer's instructions to be sure.
7. Turn on the Power
Once the light bulb is installed, you can turn on the power to the exhaust fan. The fan should now be working properly.
Tips
Here are a few tips for replacing an exhaust fan in your bathroom:
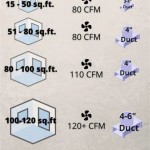
- Make sure to choose an exhaust fan that is the right size for your bathroom.
- Follow the manufacturer's instructions carefully to ensure that the fan is installed properly.
- If you are not comfortable working with electricity, you should hire a qualified electrician to replace the exhaust fan.
- Replace the exhaust fan every 5-7 years to ensure that it is working properly.

How To Replace A Bathroom Fan With S Wikihow

How To Replace And Install Broken Bathroom Exhaust Fan Motor Easy Diy Fix Noisy Rattling

How To Replace And Install A Bathroom Exhaust Fan From Start Finish For Beginners Easy Diy

How To Install Clean A Bathroom Fan

How To Install A Bathroom Exhaust Fan Broan 688

Installing A Bathroom Fan Fine Homebuilding

How To Install A Bathroom Exhaust Fan

How To Replace And Install A Bathroom Exhaust Fan From Start Finish For Beginners Easy Diy

Install A New Bathroom Vent Fan Light

How To Replace A Bathroom Fan With S Wikihow