RV Bathroom Vent Fan Upgrade: A Comprehensive Guide
Maintaining a well-ventilated bathroom is crucial for ensuring optimal air quality and preventing moisture build-up in your RV. A properly functioning bathroom vent fan is essential for achieving this goal and enhancing the overall comfort of your RV living space.
If you're experiencing issues with your current bathroom vent fan or simply looking to upgrade it for improved performance, this comprehensive guide will provide you with all the necessary information to make an informed decision. We'll cover everything from choosing the right fan to the step-by-step installation process.
Choosing the Right RV Bathroom Vent Fan
The first step in upgrading your bathroom vent fan is selecting the right model for your RV. Here are some key factors to consider:
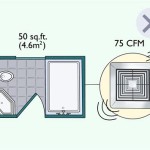
- Fan Capacity: Measured in cubic feet per minute (CFM), fan capacity indicates the amount of air the fan can move. Choose a fan with a CFM rating that is appropriate for the size of your bathroom.
- Noise Level: Opt for a fan with a low decibel (dB) rating for quieter operation, especially in a small RV bathroom where noise can be amplified.
- Features: Consider additional features such as a built-in light, timer, or humidity sensor for enhanced functionality.
- Compatibility: Ensure that the fan you choose is compatible with the existing vent hole size and electrical system in your RV.
Step-by-Step Installation Process
Once you have selected the perfect RV bathroom vent fan, follow these steps to install it safely and effectively:
- Safety First: Turn off the power to the bathroom vent fan at the breaker panel before starting any work.
- Remove the Old Fan: Disconnect the wires from the old fan and remove the mounting screws. Carefully remove the fan from the vent hole.
- Prepare the Vent Hole: Inspect the vent hole for any debris or damage and clean it as necessary.
- Install the New Fan: Position the new fan in the vent hole and secure it with the mounting screws.
- Connect the Wires: Connect the wires from the fan to the corresponding wires in the RV's electrical system, ensuring proper polarity (black to black, white to white, green or bare wire to ground).
- Test the Fan: Turn on the power at the breaker panel and test the fan to ensure it is functioning properly.
- Finish Up: Clean up any debris or tools and enjoy the improved ventilation in your RV bathroom.
Additional Tips for Optimal Performance
Maintaining a well-functioning bathroom vent fan is key to its longevity and optimal performance. Here are a few tips:
- Regular Cleaning: Clean the fan blades and housing regularly to prevent dust and debris accumulation.
- Ventilation During Showers: Always turn on the bathroom vent fan during showers to remove excess moisture and prevent fogging.
- Covers and Vents: Keep the bathroom vent fan cover closed when not in use to prevent air leakage.
- Maintenance: Regularly inspect the fan and replace any worn or damaged components, such as the motor or bearings.
Conclusion
Upgrading your RV bathroom vent fan can significantly enhance the air quality, comfort, and longevity of your RV. By following the comprehensive guide and tips provided in this article, you can choose the right fan, install it safely, and enjoy the benefits of a well-ventilated bathroom in your RV.

Rv Bathroom Fan Upgrade 300 More Airflow

Rv Bathroom Fan Upgrade Heng S Vortex

How To Correctly Install Replace Rv Vent Fan

Vortex Replacement Vent Fan Upgrade Camping World

Vortex Replacement Vent Fan Upgrade Camping World

Heng S Vortex Ii Rv Vent Fan Bathroom Upgrade How To Install And Review

How To Super Easy Rv Roof Vent Fan Upgrade Vortex Ii Kit

Upgrade Your Rv Bathroom With A 12v Type Vent Motor And Fan Blade Set Includes Blades S

Kit Bashing Rv Manual Vents To Powered Fan

How To Replace Rv Vent With Fan And Upgrade Lighting
See Also


