Bathroom Sink Faucet Leaking From Handle: A Comprehensive Guide to Troubleshooting and Repair
A leaking bathroom sink faucet from the handle is a common household problem that can waste water and increase utility bills. If you're facing this issue, fret not, as resolving it is usually a straightforward task that you can attempt on your own with the right tools and a bit of know-how.
In this comprehensive guide, we'll delve into the various causes of a bathroom sink faucet leaking from the handle and provide step-by-step instructions on how to diagnose and repair the problem yourself. Whether you're a seasoned DIYer or a complete novice, this article will empower you with the knowledge and confidence to tackle this plumbing issue efficiently.
Causes of Bathroom Sink Faucet Leaking From Handle
Several factors can contribute to a bathroom sink faucet leaking from the handle. Here are the most common culprits:
- Worn-out Washer: The washer is a small rubber or plastic component that creates a seal between the handle and the faucet body. Over time, the washer can wear out or deteriorate, leading to leaks.
- Loose Handle: If the handle on your faucet is loose, it can allow water to seep through the base and leak out.
- Damaged O-rings: O-rings are rubber gaskets that create a seal around the base of the handle. Damaged or worn-out O-rings can also cause leaks.
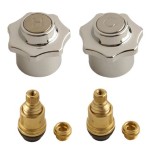
- Faulty Cartridge: In some faucet models, a cartridge controls the flow of water. If the cartridge becomes faulty, it may cause leaks.
Step-by-Step Repair Guide
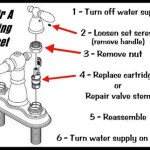
Before you begin any repairs, ensure to turn off the water supply to your sink by closing the shut-off valves underneath. Once the water is turned off, follow these steps to repair the leaking faucet:
- Remove the Handle: Using a screwdriver or Allen wrench, remove the screw that secures the handle to the faucet body. Gently pull the handle straight up to detach it.
- Inspect Washer and O-rings: Examine the washer and O-rings for any signs of wear, damage, or deterioration. Replace any damaged components with new ones.
- Tighten Loose Handle: If the handle was loose, use the screwdriver or Allen wrench to tighten it securely. Avoid overtightening to prevent damaging the handle.
- Replace Cartridge (if applicable): If you have a cartridge-type faucet, you may need to replace the cartridge if it's faulty. Follow the manufacturer's instructions for cartridge replacement.
- Reassemble the Faucet: Once the repairs are complete, reassemble the faucet by placing the handle back on the body and securing it with the screw.
- Turn on Water Supply and Test: Turn on the water supply and check for leaks. If there are no leaks, your repair was successful.
If you encounter any difficulties or uncertainties during the repair process, do not hesitate to consult a qualified plumber for assistance.
Preventive Measures
To prevent future leaks from occurring, consider these preventive measures:
- Inspect your faucet handles regularly for any signs of looseness.
- Replace washers and O-rings every few years or sooner if they show signs of wear.
- Use a gentle touch when operating the faucet handles.
- Consider installing a water-saving faucet to reduce water consumption and potential leaks.
By following these tips and performing regular maintenance, you can keep your bathroom sink faucet leak-free for years to come.

5 Reasons Your Faucet Is Dripping Water How To Fix It

How To Fix A Leaky Bathroom Sink Faucet

How To Fix A Leaky Faucet Handle

Easy How To Fix A Leaky Sink Leaking From Handle Or Faucet

How To Fix A Leaky Single Handle Sink Faucet

5 Reasons Your Faucet Is Dripping Water How To Fix It

How To Fix A Leaky Delta Two Handle Faucet

How To Fix A Leaking Bathroom Faucet Repair Faucets Bathtub
How To Fix A Leaky Faucet With Seemingly Non Removable Handles Plumbing Leak Diy Quora

Simple Ways To Fix A Leaky Delta Bathroom Sink Faucet


