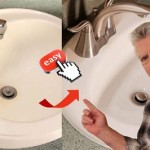
Bathroom Sink Drain Stopper Replacement
A clogged or malfunctioning bathroom sink drain stopper can be a frustrating inconvenience. While it may seem like a simple task, replacing a drain stopper can be tricky if you're not familiar with the process. This step-by-step guide will provide you with all the necessary knowledge and instructions to successfully replace your bathroom sink drain stopper.
Materials You'll Need:
- New drain stopper
- Wrench or pliers
- Putty knife or flathead screwdriver
- Gloves (optional)
Step 1: Safety First
Before you begin, turn off the water supply to the sink using the valve located under the sink. This will prevent water from flowing into the sink while you work.
Step 2: Remove the Old Stopper
There are two common types of drain stoppers: lift-and-turn stoppers and pop-up stoppers. The removal method varies depending on the type:
Lift-and-Turn Stopper:
Using a wrench or pliers, loosen the nut that holds the stopper in place. Once loose, lift the stopper assembly out of the sink.Pop-Up Stopper:
Insert a putty knife or flathead screwdriver into the small opening in the center of the drain. Pry up on the edges to release the stopper and pull it out.Step 3: Clean the Drain
Once the stopper is removed, use a cloth or sponge to remove any debris or hair that may have accumulated in the drain. This will prevent the new stopper from becoming clogged prematurely.
Step 4: Install the New Stopper
Lift-and-Turn Stopper:
Apply a small bead of plumber's putty around the base of the new stopper. Insert the stopper into the drain hole and tighten the nut by hand. Then, use the wrench or pliers to firmly tighten the nut.Pop-Up Stopper:
Align the new stopper with the drain hole. Push the stopper down into the hole until it clicks into place.Step 5: Test the Stopper
Turn on the water supply and fill the sink. The stopper should effectively prevent water from draining. Lift the stopper to allow water to flow down the drain. The stopper should seal the drain completely when closed.
Step 6: Seal the Nut (for Lift-and-Turn Stoppers)
If you installed a lift-and-turn stopper, apply a small amount of plumber's putty to the nut to create a watertight seal and prevent leaks.
Tips:
- Purchase a stopper that fits your drain size and type.
- If you encounter any resistance when removing the old stopper, use a penetrating lubricant to loosen it.
- If you are replacing a pop-up stopper, make sure the drain assembly is in good condition. A damaged assembly may need to be replaced.
- If you are experiencing repeated drain stopper issues, you may have a larger plumbing problem that requires professional attention.
Replacing a bathroom sink drain stopper is a straightforward task that can be easily accomplished with the right tools and a bit of know-how. By following these steps, you can restore your sink's functionality and prevent future clogging issues.
Install A Drain Stopper So The Is Removable

Universal Washbasin Water Head Leaking Stopper Bathroom Sink Drain Strainer For And Bathtub Replacement Parts Silver Com

Bathroom Sink Popup And Stopper Problems

Pop Up Lift Turn Pull Out Stopper Bathroom Sink Drains

Fixing Tricky Pop Up Drain Sink Stopper Mechanisms Efficient Plumber

Quick Tip 26 Pop Up Stopper Sticks Misterfix It Com

How To Replace A Pop Up Sink Drain Remove The Old Bathroom Stopper Repair

How To Replace Bathroom Sink Stopper Avg Cost 25 65 1 2hrs

How To Replace A Sink Stopper Quick And Simple Home Repair

Yasinu Bathroom Pop Up Drain Assembly Vessel Sink Stopper With Overflow In Matte Black Ynb007a02mb The Home


