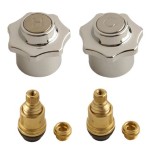
How to Remove a Bathroom Faucet from a Sink
Replacing a bathroom faucet is a relatively simple plumbing task that can be completed in about an hour. By following these step-by-step instructions, you can save yourself the cost of hiring a plumber.
Tools and Materials You'll Need:
- Adjustable wrench
- Basin wrench
- Pliers
- Screwdriver
- Bucket
- Flashlight
- Replacement faucet
Step-by-Step Instructions:
1. Turn off the water supply. Locate the water supply valves beneath the sink and turn them clockwise to shut off the water. 2. Open the faucet to release remaining water. This will prevent water from spilling out when you disconnect the faucet. 3. Disconnect the supply lines. Use an adjustable wrench to loosen the nuts that connect the supply lines to the faucet. Be careful not to overtighten the nuts. 4. Disconnect the drain line. If your faucet has a pop-up drain, you'll need to disconnect the drain line. To do this, use pliers to loosen the nut that connects the drain line to the faucet. 5. Remove the mounting nuts. Use a basin wrench to loosen the mounting nuts that hold the faucet in place. These nuts are usually located beneath the sink. 6. Lift the faucet out of the sink. Once the mounting nuts are loose, you can lift the faucet up and out of the sink. 7. Inspect the old faucet. Before installing the new faucet, take a moment to inspect the old one. Look for any signs of damage or corrosion. If you find any damage, you may need to replace the entire faucet assembly. 8. Install the new faucet. Place the new faucet in the sink and tighten the mounting nuts. Be careful not to overtighten the nuts. 9. Connect the supply lines. Thread the supply lines onto the faucet and tighten the nuts. Again, be careful not to overtighten the nuts. 10. Connect the drain line. If your faucet has a pop-up drain, connect the drain line to the faucet and tighten the nut. 11. Turn on the water supply. Slowly turn on the water supply valves and check for leaks. If you find any leaks, tighten the nuts until the leak stops. 12. Test the faucet. Turn on the faucet and check for proper operation. Make sure the water flows smoothly and that the temperature is correct.Tips:
- If you have a flashlight, use it to inspect the underside of the sink for any leaks.
- If you're not comfortable working with plumbing, it's best to call a plumber.
- If you're replacing a faucet with a different type of faucet, you may need to make some modifications to the sink.

Diy How To Replace A Bathroom Sink Faucet Remove Install

How To Replace A Bathroom Faucet Removal And Installation

How To Replace A Bathroom Faucet Home Repair Tutor

How To Replace A Bathroom Faucet Home Repair Tutor

How To Remove Bathroom Faucet Easy Simple

How To Replace A Bathroom Faucet Tinged Blue

How To Remove Bathroom Faucet Easy Simple

How To Remove And Install A Bathroom Faucet

Replacing A Bathroom Faucet Fine Homebuilding
Single Handle Bathroom Sink Faucets Removal
See Also


