How to Fix a Dripping Faucet in the Bathroom
A dripping faucet is not only a nuisance, but it can also waste a lot of water and increase your water bill. If you have a dripping faucet in your bathroom, don't worry, it's a relatively easy fix that you can do yourself. Here's a step-by-step guide on how to fix a dripping faucet in the bathroom:
Tools and Materials You'll Need:
- Adjustable wrench or pliers
- Flathead screwdriver
- Phillips head screwdriver
- Replacement faucet washer or O-ring (if needed)
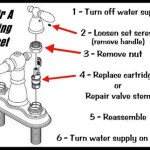
Step 1: Turn Off the Water Supply
Before you start working on the faucet, you need to turn off the water supply. There will be two shut-off valves beneath the sink, one for hot water and one for cold water. Turn both valves clockwise to shut off the water.
Step 2: Remove the Aerator
If your faucet has an aerator, it's a good idea to remove it before you start working on the faucet itself. The aerator is the small, mesh screen that screws onto the end of the faucet. To remove the aerator, simply unscrew it by hand.
Step 3: Remove the Handle
Once the aerator is removed, you can remove the handle. There will be a small set screw on the side or bottom of the handle. Use a flathead screwdriver to loosen the set screw and then pull the handle off.
Step 4: Remove the Stem Assembly
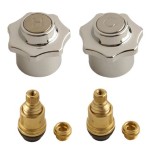
Once the handle is removed, you can remove the stem assembly. The stem assembly is the part of the faucet that contains the washer or O-ring that is causing the drip. To remove the stem assembly, use an adjustable wrench or pliers to loosen the packing nut that is located at the base of the stem.
Step 5: Replace the Washer or O-Ring
Once the stem assembly is removed, you can replace the washer or O-ring. The washer or O-ring is a small, rubber gasket that seals the stem assembly and prevents water from leaking. To replace the washer or O-ring, simply remove the old one and replace it with a new one.
Step 6: Reassemble the Faucet
Once the washer or O-ring is replaced, you can reassemble the faucet. To reassemble the faucet, simply reverse the steps that you took to disassemble it. First, insert the stem assembly into the faucet body and tighten the packing nut. Then, reattach the handle and tighten the set screw. Finally, reattach the aerator.
Step 7: Turn On the Water Supply
Once the faucet is reassembled, you can turn on the water supply. Slowly open the shut-off valves until the water is flowing through the faucet. Check for leaks and make sure that the faucet is no longer dripping.
Tips
- If you can't find a replacement washer or O-ring that is the exact same size as the old one, you can use a universal washer or O-ring.
- If you have a stubborn packing nut, you can use a penetrating oil to help loosen it.
- If you are still having trouble fixing the dripping faucet, you may need to call a plumber.

How To Fix A Bathroom Faucet 14 Steps

How To Fix A Dripping Bathroom Faucet

How To Fix A Bathroom Faucet 14 Steps

5 Reasons Your Faucet Is Dripping Water How To Fix It

Part 1 Of 2 How To Fix A Dripping Faucet

How To Fix A Leaking Bathtub Faucet The Home

How To Fix A Leaking Bathtub Faucet Diy Family Handyman

Simple Ways To Fix A Leaky Delta Bathroom Sink Faucet

Properly Fixing A Leaky Sink Faucet Wallside Windows

5 Reasons Your Faucet Is Dripping Water How To Fix It


