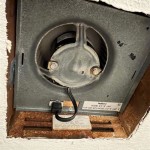
Adding an Exhaust Fan to Your Bathroom: A Step-by-Step Guide
An exhaust fan is an essential component of any bathroom, helping to remove moisture, odors, and pollutants from the air. Not only does this make your bathroom more comfortable and pleasant, but it also prevents the growth of mold and mildew, which can lead to health problems.
If your bathroom doesn't have an exhaust fan, or if your current fan isn't working properly, it's a relatively simple and inexpensive project to install a new one. Here's a step-by-step guide to help you through the process:
Step 1: Gather Your Materials
Before you start, gather all of the materials you'll need for the project:
- Exhaust fan
- Ductwork
- Electrical wire
- Wire connectors
- Screws
- Caulk
- Drywall saw or hole saw
- Drill
- Screwdriver
- Electrical tape
Step 2: Choose the Right Exhaust Fan
Exhaust fans are available in a variety of sizes and styles. To choose the right one for your bathroom, you'll need to consider the size of the room and the amount of ventilation you need.
For a small bathroom, a fan with a CFM (cubic feet per minute) rating of 50 to 70 will be sufficient. For a larger bathroom, you'll need a fan with a CFM rating of 80 to 100.
Step 3: Cut the Hole in the Ceiling
Once you've chosen an exhaust fan, it's time to cut the hole in the ceiling. The hole should be the same size as the exhaust fan housing.
To cut the hole, you can use a drywall saw or a hole saw. If you're using a drywall saw, score the ceiling around the perimeter of the hole first. Then, carefully cut out the hole.
Step 4: Install the Exhaust Fan
Once the hole is cut, you can install the exhaust fan. First, connect the electrical wires to the fan motor. Then, insert the fan into the hole and secure it with screws.
Next, connect the ductwork to the exhaust fan. Ductwork is available in a variety of materials, including plastic, metal, and flexible ductwork. Choose the type of ductwork that best suits your needs.
Step 5: Finish the Installation
Once the exhaust fan and ductwork are installed, you can finish the installation by caulking around the edges of the fan and ductwork. This will help to seal any gaps and prevent air from leaking out.
Finally, turn on the exhaust fan and make sure that it's working properly.
Step 6: Enjoy the Benefits
Once your exhaust fan is installed, you can enjoy the benefits of improved air quality in your bathroom. Your bathroom will be more comfortable and pleasant, and you'll be less likely to experience problems with mold and mildew.
Follow these steps and you'll be able to install an exhaust fan in your bathroom in no time.

Installing A Bathroom Fan Fine Homebuilding

Install A New Bathroom Vent Fan Light

How To Replace And Install A Bathroom Exhaust Fan From Start Finish For Beginners Easy Diy

Blog

How To Replace And Install A Bathroom Exhaust Fan From Start Finish For Beginners Easy Diy

Venting A Bath Fan In Cold Climate Fine Homebuilding

How To Install A Bathroom Exhaust Fan Broan 688

How To Install A Bathroom Exhaust Fan

How Much Does It Cost To Install A Bathroom Fan Forbes Home

How To Install A Bathroom Roof Vent Family Handyman


