How To Renovate a Bathroom Shower
Bathroom shower renovation is a significant undertaking that can dramatically improve the functionality, aesthetics, and value of a home. A successful renovation requires careful planning, budgeting, and execution. This article provides a comprehensive guide to renovating a bathroom shower, covering essential steps and considerations for achieving a desirable outcome.
Planning and Preparation
The initial phase of a shower renovation is critical for setting the stage for a smooth and effective project. It involves a thorough assessment of existing conditions, defining project goals, and establishing a realistic budget.
Assessment of Existing Conditions: Begin by evaluating the current state of the shower. This includes inspecting the tiles, grout, showerhead, faucet, drain, and surrounding walls for signs of damage, mold, leaks, or deterioration. Note the dimensions of the shower space and assess the plumbing and electrical systems. Understanding the existing infrastructure is essential for determining the scope of the renovation and identifying potential challenges.
Defining Project Goals: Clearly articulate the desired outcome of the renovation. This includes considering factors such as functionality, style, and accessibility. Ask questions like: Is the goal to update the aesthetic appeal, improve water pressure, increase storage, or enhance accessibility for individuals with mobility challenges? Defining these goals will guide the design and material selection process.
Budget Allocation: Establish a comprehensive budget that includes all anticipated costs. Consider expenses for materials (tiles, grout, showerhead, faucet, shower door/curtain), labor (if hiring contractors), permits (if required), demolition and disposal, and unexpected contingencies. Research the cost of materials and labor in the local area to create a realistic budget. It is crucial to allocate a contingency fund (typically 10-15% of the total budget) to cover unforeseen expenses that may arise during the renovation process.
Design and Layout: Develop a detailed design and layout for the renovated shower. Consider factors such as the size and shape of the shower, the placement of fixtures, and the overall style. Research various design options, such as tile patterns, showerhead types, and storage solutions. Create a scaled drawing or use design software to visualize the renovated shower space. This will help in making informed decisions and communicating the design to contractors, if applicable.
Permits: Determine if any permits are required for the renovation. Contact the local building department to inquire about permit requirements for plumbing, electrical, and structural modifications. Obtaining the necessary permits ensures that the renovation complies with local building codes and regulations.
Material Selection: Choose materials that align with the design aesthetic, budget, and performance requirements. Consider factors such as durability, water resistance, ease of maintenance, and safety. Popular materials for shower renovations include ceramic tile, porcelain tile, stone tile, glass tile, acrylic shower pans, and solid surface surrounds. Research the properties of each material and select options that best suit the specific needs of the project.
Demolition and Preparation
The demolition phase involves carefully removing existing fixtures, tiles, and other materials to prepare the shower space for the new installation. Proper planning and execution are essential to minimize damage and ensure a clean and safe working environment.
Protection: Before beginning demolition, protect the surrounding areas from dust, debris, and damage. Cover floors, walls, and fixtures with plastic sheeting or drop cloths. Seal off the bathroom with plastic sheeting to prevent dust from spreading to other parts of the house.
Fixture Removal: Turn off the water supply to the shower before removing any plumbing fixtures. Disconnect the showerhead, faucet, drain, and any other fixtures that will be replaced. Use appropriate tools to carefully detach the fixtures without damaging the surrounding walls or plumbing. Dispose of the old fixtures properly, following local regulations for waste disposal.
Tile Removal: Remove the existing tiles using a chisel, hammer, and pry bar. Work carefully to avoid damaging the underlying walls or floor. Wear safety glasses and gloves to protect yourself from flying debris. If the tiles are difficult to remove, consider using a tile removal tool or contacting a professional for assistance.
Surface Preparation: After removing the tiles, inspect the underlying surface for damage, mold, or rot. Repair any damaged areas before proceeding with the new installation. Clean the surface thoroughly to remove any adhesive, grout, or debris. Apply a waterproofing membrane to the walls and floor to prevent water damage. This membrane should be applied according to the manufacturer's instructions and should cover all seams and corners.
Plumbing and Electrical: Inspect the plumbing and electrical systems to ensure they are in good working condition. If necessary, make repairs or upgrades to the plumbing or electrical systems before proceeding with the new installation. Consult with a licensed plumber or electrician for any complex repairs or upgrades.
Installation and Finishing
The installation phase involves installing new tiles, fixtures, and accessories to complete the renovated shower. Careful attention to detail and adherence to manufacturer's instructions are essential for achieving a professional and long-lasting result.
Tile Installation: Begin by laying out the tiles to ensure a proper fit and alignment. Apply thin-set mortar to the back of each tile and press it firmly into place. Use tile spacers to maintain consistent spacing between the tiles. Ensure the tiles are level and plumb. Allow the mortar to dry completely before grouting.
Grouting: After the mortar has dried, apply grout to fill the spaces between the tiles. Use a grout float to press the grout into the joints. Remove excess grout with a damp sponge. Allow the grout to dry according to the manufacturer's instructions. Seal the grout to protect it from water damage and staining.
Fixture Installation: Install the new showerhead, faucet, and drain according to the manufacturer's instructions. Ensure all connections are tight and leak-free. Apply plumber's tape to threaded connections to prevent leaks. Test the fixtures to ensure they are functioning properly.
Shower Door/Curtain Installation: Install a new shower door or curtain to prevent water from splashing outside the shower area. Follow the manufacturer's instructions for installation. Ensure the shower door or curtain is properly sealed to prevent leaks.
Final Touches: Install any accessories, such as shelves, grab bars, or towel racks. Clean the shower thoroughly to remove any dust, debris, or grout haze. Inspect the shower for any imperfections and make any necessary repairs or adjustments. Apply caulk to seal any gaps or cracks to prevent water damage.
Key Points for a Successful Shower Renovation
Several key elements contribute to a favorable outcome in a shower renovation project. Consideration of waterproofing, proper ventilation, and accessibility are crucial for long-term functionality and user satisfaction.
Waterproofing is Paramount
Effective waterproofing is arguably the most critical aspect of a shower renovation. Failure to properly waterproof can lead to significant water damage, including mold growth, structural damage, and costly repairs. Applying a high-quality waterproofing membrane to the walls and floor of the shower is essential. This membrane acts as a barrier to prevent water from penetrating the underlying surface. Pay particular attention to seams, corners, and penetrations around plumbing fixtures, as these are common areas for leaks to occur. Consider using a liquid-applied membrane or a sheet membrane, depending on the specific requirements of the project. Follow the manufacturer’s instructions carefully to ensure proper application and performance.
Ventilation Improves Longevity
Proper ventilation is crucial for preventing moisture buildup in the shower area. Excessive moisture can lead to mold growth, mildew, and deterioration of building materials. Installing a bathroom exhaust fan is essential for removing moisture from the air. The fan should be sized appropriately for the size of the bathroom and should be vented to the exterior of the house. Run the exhaust fan during and after showers to remove moisture and prevent condensation. Consider installing a timer switch for the exhaust fan to ensure it runs for an adequate amount of time. Proper ventilation not only protects the shower from moisture damage but also improves air quality and reduces the risk of respiratory problems.
Accessibility Considerations Enhance Usability
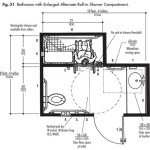
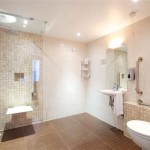
Incorporating accessibility features into a shower renovation can significantly enhance the usability and safety of the shower, particularly for individuals with mobility challenges or those planning to age in place. Consider installing grab bars to provide support and stability. Grab bars should be strategically placed near the shower entrance, seat, and controls. Choose grab bars that are sturdy and securely anchored to the wall. Another accessibility consideration is the shower entrance. A curbless shower entrance eliminates the need to step over a threshold, making it easier for individuals with mobility limitations to enter and exit the shower. A shower seat provides a comfortable and safe place to sit while showering. Consider installing a fold-down shower seat to save space when not in use. By incorporating these accessibility features, the shower can become a more inclusive and user-friendly space for everyone.

Diy Shower Remodel Start To Finish Part 1 Of 2

Shower Remodel 2025 Guide To Costs Types And Materials
Shower Remodel Guide Tips And Tricks For A Successful Renovation

Bathroom Remodel W Steam Shower Rogue Engineer

17 Bathroom Renovation Ideas Extra Space Storage

17 Bathroom Renovation Ideas Extra Space Storage

Bath Remodel 5 Main Elements Advance Design Studio

Bath Remodel Renovation Bathtub Planet

24 Best Bathroom Remodeling Ideas For 2025 Foyr

Master Bathroom Renovation Converting A Bathtub Into Walk In Shower Our Handcrafted Life

