How To Install Sheetrock In a Bathroom
Bathrooms present unique challenges for drywall installation due to the presence of moisture. Proper installation is crucial to prevent mold, mildew, and structural damage. This guide outlines the necessary steps to install sheetrock, also known as drywall, in a bathroom environment.
Planning and Preparation: Accurate measurements are essential. Measure the bathroom walls and ceiling carefully, noting any obstructions like windows, doors, or plumbing fixtures. Purchase enough moisture-resistant drywall, commonly referred to as "green board," to cover the area. This specialized drywall is designed to withstand humid conditions. Acquire necessary tools including a utility knife, measuring tape, T-square, drywall saw, drill, screw gun, drywall screws, joint compound (also known as mud), mud pan, taping knife, sanding sponge, and safety glasses.
Protection and Safety: Before starting any work, turn off the power to the bathroom to prevent electrical hazards. Cover the floor with drop cloths to protect it from damage and debris. Wear appropriate safety glasses to protect eyes from dust and debris.
Installation of the Sheetrock: Begin by installing the ceiling sheetrock. It is generally recommended to have a helper when installing ceiling panels. Lift the sheetrock into place, ensuring it is snug against the ceiling joists. Secure the sheetrock using drywall screws, spaced approximately every 16 inches along the joists. The screw heads should be slightly recessed below the surface of the drywall, but not so deep as to break the paper facing. Repeat this process for all ceiling panels.
Next, install the wall sheetrock, starting with the longest wall. Position the sheetrock against the wall studs, ensuring a tight fit. Secure the sheetrock to the studs using drywall screws, spaced every 16 inches along the studs. Cut out openings for windows, doors, and plumbing fixtures using a drywall saw or utility knife after the sheetrock is secured to the wall. Ensure accurate measurements and cuts for a professional finish. Repeat this process for all remaining walls.
Taping and Finishing: Once the drywall is installed, the seams and screw holes need to be covered with joint compound. This process, often called “mudding,” creates a smooth, seamless surface. Apply a thin layer of joint compound over the seams using a taping knife. Immediately embed paper drywall tape into the wet compound, pressing firmly to ensure good adhesion. Apply another thin layer of compound over the tape, feathering the edges to create a smooth transition. Repeat this process for all seams and inside corners.
For outside corners, apply metal corner bead to protect the corner and provide a straight edge. Secure the corner bead with drywall nails or screws, and then apply joint compound over the bead, feathering the edges. Apply a thin coat of compound over the screw holes, filling them completely.
Drying and Sanding: Allow the joint compound to dry completely according to the manufacturer's instructions. This typically takes 24 hours. Once dry, sand the dried compound smooth using a sanding sponge or sanding block. Take care not to sand too aggressively, which can damage the drywall paper. Wear a dust mask during sanding to prevent inhalation of drywall dust.
Priming and Painting: After sanding, apply a coat of primer specifically designed for drywall. This will seal the surface and provide a better base for paint adhesion. Once the primer is dry, apply at least two coats of moisture-resistant paint, allowing sufficient drying time between coats. Select a paint finish appropriate for bathroom environments, such as a satin or semi-gloss finish, which are more resistant to moisture and easier to clean.
Considerations for Wet Areas: In areas directly exposed to water, such as shower and tub surrounds, consider using a waterproof membrane or cement backer board instead of drywall. These materials offer superior water resistance compared to even moisture-resistant drywall and provide a more durable substrate for tiling.
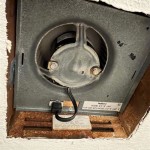
Ventilation: Proper bathroom ventilation is crucial to prevent moisture buildup, which can lead to mold and mildew growth. Ensure adequate ventilation by installing or using an exhaust fan, particularly during and after showers and baths.
Professional Assistance: If uncertain about any aspect of drywall installation, consult a qualified professional. Professional installers have the experience and expertise to handle complex situations and ensure a proper installation that meets building codes and prevents future problems.

Installing Drywall In The Bathroom Land Of Laurel

How To Finish Drywall Where It Meets The Shower Wallboard Trim Tool

How To Hang Sheetrock Tape Around A Shower Surround Or Bathtub Bathroomremodel Diydrywall

How To Finish Drywall Around A Shower Enclosure

How To Hang Drywall And Prep For Shower Surround Framing

Basement Bathroom Drywall And Cement Board Installation Remodelaholic

Bathroom Walls Sheetrock
Drywall And Cement Board For The Downstairs Bathroom Blog Homeandawaywithlisa

Installing Drywall In The Bathroom Land Of Laurel

How To Finish Drywall Around A Shower Enclosure Fine Homebuilding


