```html
How To Install A New Bathroom Fan
Bathroom fans play a crucial role in maintaining a healthy and comfortable home environment. They effectively remove excess moisture, preventing mold growth and reducing the risk of structural damage caused by humidity. Over time, bathroom fans can become inefficient, noisy, or even stop working entirely. Installing a new bathroom fan can significantly improve air quality and extend the lifespan of your bathroom fixtures. This article provides a comprehensive guide on how to safely and effectively install a new bathroom fan, outlining the necessary steps and precautions for a successful installation.
Preparing for the Installation
Proper preparation is paramount for a safe and efficient bathroom fan installation. This phase involves gathering the necessary tools and materials, ensuring electrical safety, and carefully selecting the replacement fan.
Gathering Tools and Materials: A well-equipped workspace will streamline the installation process. Essential tools include a screwdriver set (including Phillips and flathead screwdrivers), wire strippers, wire connectors (wire nuts), a voltage tester, a drill with various drill bits, a reciprocating saw (or drywall saw), pliers, measuring tape, a level, safety glasses, work gloves, and a ladder or step stool. Required materials include the new bathroom fan unit, appropriate wiring (typically 14/2 or 12/2 NM-B cable), electrical tape, duct tape (preferably foil tape), and potentially drywall patching compound and paint for any necessary repairs.
Ensuring Electrical Safety: Electricity presents a significant hazard during this project. The first and most crucial step is to disconnect the power to the bathroom fan circuit at the main electrical panel. Locate the breaker that controls the bathroom circuit and switch it off. To verify that the power is indeed off, use a voltage tester to check the wires connected to the existing fan. Never assume the power is off; always use a voltage tester to confirm. If you are uncomfortable working with electricity, it is highly recommended to hire a qualified electrician.
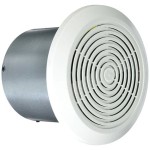
Selecting the Replacement Fan: The size and capacity of the new fan are critical considerations. The fan's capacity is measured in cubic feet per minute (CFM), which indicates the volume of air the fan can exhaust per minute. To determine the appropriate CFM for your bathroom, a general rule of thumb is to multiply the square footage of the bathroom by 1. A bathroom that is 5 feet by 8 feet (40 square feet) would require a fan with at least 40 CFM. For bathrooms with high ceilings or frequently used showers, consider a fan with a higher CFM rating. Also, consider the noise level of the fan, measured in sones. A lower sone rating indicates a quieter fan. Consider the physical dimensions of the new fan and ensure it will fit within the available space in the ceiling and attic. Some fans require larger cutouts than others, which may necessitate drywall modification.
Removing the Existing Fan
Removing the old fan requires a careful approach to avoid damaging the surrounding ceiling and wiring. This step involves disconnecting the electrical connections, detaching the fan housing from the ceiling, and removing any ductwork.
Disconnecting the Electrical Connections: After confirming that the power is off with a voltage tester, carefully remove the fan's cover. Inside, you will find the electrical connections. Typically, there will be three wires: black (hot), white (neutral), and green or bare (ground). Using wire strippers, carefully disconnect the wires from the existing fan, making note of which wire connects to which terminal or wire nut. This is crucial for properly wiring the new fan. Use electrical tape to individually cap the bare ends of the wires to prevent accidental contact before installing the new fan.
Detaching the Fan Housing: The fan housing is usually attached to the ceiling joists with screws, nails, or mounting brackets. Depending on the installation method, you may need to use a screwdriver, drill, or reciprocating saw to detach the housing. If the fan is attached with screws, simply remove them with a screwdriver. If nails are used, you may need to use a small pry bar or the claw of a hammer to carefully remove them. In some cases, the fan might be secured to mounting brackets that are attached to the joists. Carefully loosen or remove these brackets to release the fan housing. Be prepared to support the fan housing as you detach it to prevent it from falling and causing damage. If the existing fan cutout is too small for the new fan, this is the time to carefully enlarge the opening in the ceiling using a drywall saw or reciprocating saw. Take precise measurements to ensure the new fan will fit snugly.
Removing Ductwork: The fan is connected to a duct that vents the air outside. This duct is typically secured to the fan housing with duct tape or clamps. Carefully remove the duct tape or loosen the clamp to detach the duct from the fan. Inspect the ductwork for any damage or deterioration. If the duct is damaged, replace it with new ductwork to ensure proper ventilation. Flexible insulated ductwork is recommended to minimize condensation issues and reduce noise.
Installing the New Fan
The installation of the new fan involves securing the fan housing, connecting the ductwork, and making the electrical connections. This phase requires careful attention to detail to ensure the fan operates safely and efficiently.
Securing the Fan Housing: Position the new fan housing into the ceiling opening. Most new fans come with adjustable mounting brackets that can be extended to reach the ceiling joists. Secure the housing to the joists using screws. Ensure the housing is level using a level, as this will affect the fan's performance and appearance. If the fan housing does not align perfectly with the existing opening, you may need to use shims to create a level surface. Some fans require you to assemble the housing before attaching it to the ceiling. Follow the manufacturer's instructions carefully.
Connecting the Ductwork: Attach the ductwork to the fan's exhaust port. Secure the duct to the port using duct tape (preferably foil tape) or a clamp. Ensure the connection is airtight to prevent air leakage. Leaky ductwork can significantly reduce the fan's efficiency. If the existing ductwork run is long or has multiple bends, consider upgrading to a larger diameter duct to reduce air resistance. This will improve the fan's airflow and efficiency.
Making the Electrical Connections: Carefully connect the electrical wires to the new fan, matching the wires to the corresponding terminals or wire nuts. Connect the black (hot) wire from the house wiring to the black wire on the fan. Connect the white (neutral) wire from the house wiring to the white wire on the fan. Connect the green or bare (ground) wire from the house wiring to the green or bare wire on the fan. Use wire connectors (wire nuts) to secure the connections and then wrap the connections with electrical tape for added insulation. Ensure the wire connections are secure and that no bare wire is exposed. Carefully tuck the wires back into the electrical box and secure the fan's cover. Double-check all connections before restoring power.
Testing and Finishing the Installation
Once the fan is installed, testing and finishing the installation are essential to ensure proper operation and aesthetics. This phase involves restoring power, verifying fan operation, and patching any drywall damage.
Restoring Power and Testing the Fan: After all connections are made and the fan cover is securely in place, restore power to the circuit at the main electrical panel. Turn on the bathroom fan switch and verify that the fan operates correctly. Listen for any unusual noises or vibrations. Check the airflow to ensure the fan is exhausting air properly. If the fan does not operate, immediately turn off the power at the breaker and recheck all wiring connections. If the fan still does not work after verifying the wiring, consult the manufacturer's instructions or contact a qualified electrician.
Patching Drywall Damage: If any drywall damage occurred during the removal or installation process, patch the damage using drywall patching compound. Apply the compound to the damaged area using a putty knife, feathering the edges to blend with the surrounding surface. Allow the compound to dry completely, then sand it smooth. Prime the patched area and paint it to match the surrounding ceiling. This will ensure a seamless and professional-looking finish.
Final Inspection: Conduct a final inspection of the installation. Ensure all connections are secure, the fan is operating properly, and the ceiling is clean and free of debris. Verify that the ductwork is properly connected and airtight. Dispose of any leftover materials properly. By following these steps carefully, you can successfully install a new bathroom fan and improve the air quality and comfort of your bathroom.
```
Install A New Bathroom Vent Fan Light The San Fernando Valley Sun

How To Install Clean A Bathroom Fan

How To Replace And Install A Bathroom Exhaust Fan From Start Finish For Beginners Easy Diy

How To Install A Bathroom Exhaust Fan Broan 688

How To Replace A Bathroom Fan With S Wikihow

How To Install A Bathroom Exhaust Fan

How To Install A Bathroom Exhaust Fan Ducting Full Walkthrough Broan 688 Builds By Maz

How To Replace Or Install An Easy Bath Fan The Home

A Breath Of Fresh Air Installing Bathroom Exhaust Fans Stay Up To Date Industry News And Updates From Allied Emergency Services

How To Install A Bathroom Fan Replacement The Home
See Also


