How to Vent a Bathroom Exhaust Fan
A bathroom exhaust fan is an essential part of any bathroom. It helps to remove moisture and odors from the air, which can help to prevent mold and mildew growth. If your bathroom exhaust fan is not properly vented, it can actually make your bathroom more humid and unhealthy.
There are two main ways to vent a bathroom exhaust fan: through the roof or through the wall. Venting through the roof is the most common method, and it is typically the easiest to install. However, if your bathroom is located on an upper floor or if there is no access to the roof, you may need to vent the fan through the wall.
Venting Through the Roof
To vent a bathroom exhaust fan through the roof, you will need the following materials:
- A bathroom exhaust fan
- A length of flexible ducting
- A roof vent
- A caulk gun
- A screwdriver
Once you have gathered your materials, you can follow these steps to vent the fan:
1.Locate a suitable location for the fan. The fan should be installed in the ceiling or wall, as close to the shower or bathtub as possible.
2.Cut a hole in the ceiling or wall for the fan. The hole should be the same size as the fan housing.
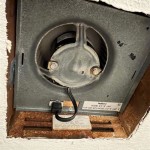
3.Install the fan in the hole. Secure the fan with screws, and then caulk around the edges of the fan housing to seal it.
4.Attach the flexible ducting to the fan. The ducting should be routed to the roof vent.
5.Install the roof vent. The roof vent should be installed according to the manufacturer's instructions.
6.Test the fan to make sure it is working properly.
Venting Through the Wall
To vent a bathroom exhaust fan through the wall, you will need the following materials:
- A bathroom exhaust fan
- A length of flexible ducting
- A wall vent
- A caulk gun
- A screwdriver
Once you have gathered your materials, you can follow these steps to vent the fan:
1.Locate a suitable location for the fan. The fan should be installed in the ceiling or wall, as close to the shower or bathtub as possible.
2.Cut a hole in the ceiling or wall for the fan. The hole should be the same size as the fan housing.
3.Install the fan in the hole. Secure the fan with screws, and then caulk around the edges of the fan housing to seal it.
4.Attach the flexible ducting to the fan. The ducting should be routed to the wall vent.
5.Install the wall vent. The wall vent should be installed according to the manufacturer's instructions.
6.Test the fan to make sure it is working properly.
Tips for Venting a Bathroom Exhaust Fan
- Use a fan that is the appropriate size for your bathroom. A fan that is too small will not be able to remove enough moisture and odors from the air, while a fan that is too large will be noisy and inefficient.
- Make sure the fan is installed properly. A fan that is not installed properly can create a fire hazard or cause damage to your home.
- Clean the fan regularly. A dirty fan will not be able to remove moisture and odors from the air as effectively.
- Use the fan when you shower or bathe. This will help to remove moisture from the air and prevent mold and mildew growth.

Venting A Bath Fan In Cold Climate Fine Homebuilding

Blog

Bathroom Exhaust Fans Building America Solution Center

How To Replace And Install A Bathroom Exhaust Fan From Start Finish For Beginners Easy Diy

How To Replace And Install A Bathroom Exhaust Fan From Start Finish For Beginners Easy Diy

Bathroom Fan Venting Tips Gui

How To Install A Bathroom Roof Vent Family Handyman

Invisible Ventilation For A Better Bath Fine Homebuilding

Bathroom Vent Piping To Exterior Inspecting Hvac Systems Internachi Forum

Bathroom Exhaust Vents In Your San Antonio Area Home Jwk Inspections
See Also


